While merrily skipping through my Warhammer side quest I heard about Finecast models, and knew that the path I was on would lead me to them.
So sure enough a buddy scored a deal off facebook market place while hunting for Sisters of Battle. This deal included a bag of stepped on Necrons, and a new in box Trazyn the Infinite.
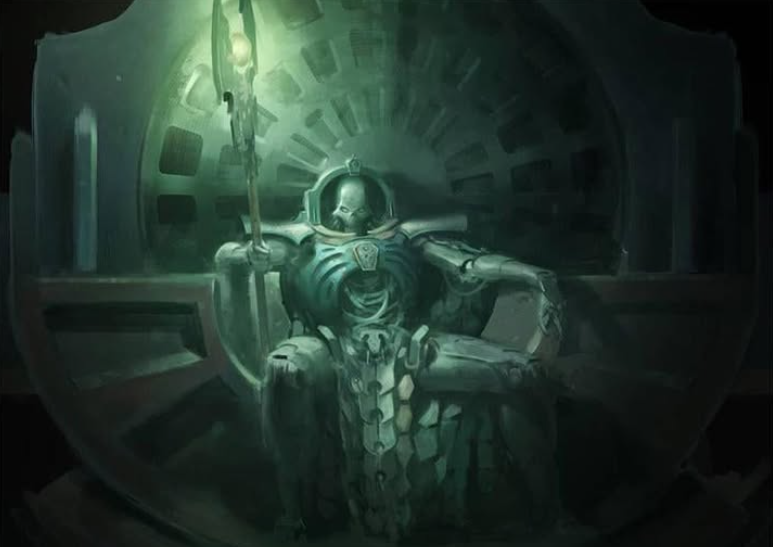
The lore behind Trazyn got me excited to paint this model up, and I set some goals for myself. For this project I wanted to follow the box art as closely as possible, use dry brushing to highlight his cape, and paint up some glowing effects.
Contents
Who is Trazyn?
Trazyn the Infinite is a protubernat character in the Warhammer 40k universe, who’s escapades over shadow his current datasheet in 10th edition.
On paper he’s a Necron Overlord of the Nihilakh Dynasty, but he is best know for his self-appointed role as the Archaeovist of the Galleries of Solemnace.
In this role Trazyn is driven by an instiable desire to collect and preserve the galaxy’s most significant relics and moments. Often ‘liberating’ them from other civilizations, or other Necrons, under the gise of protecting them form the ravages of time and war.
This podcast by Adeptus Ridiculous shines a light on what motivates trazyn and is worth a listen.
These actions have him affectionately know as a scheming, electic kleptomaniac, and this has created many lore podcasts documenting his endless looting!
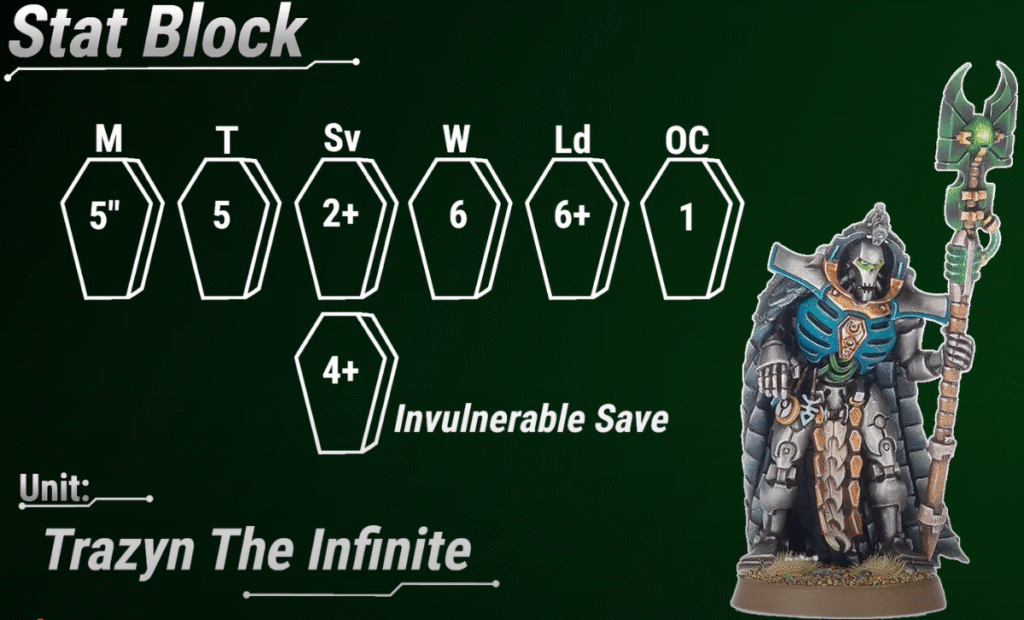
Datasheet
Here is the underwhelming datasheet for our boy. His Acient Collector ability is decent, but the rest has us hoping for a refresh. This video by WorHammer40k covers playing Trazyn and was the resource for the Stat Block and Abilities below.
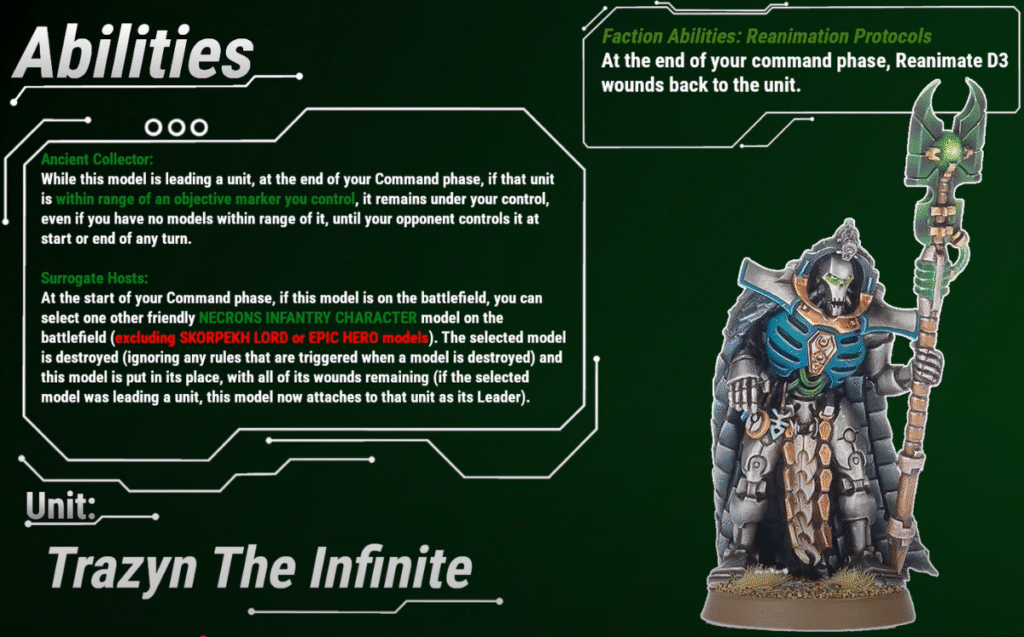
I’ve fielded him in a few games and found his abilities pair well with the Hyperspatial Transfer Node enhancement from the Hypercrypt Legion detachment. I had him leading a unit of Immortals with a Plasmancer bearer the enhancement that garantees an Advance of 6″. This boosts the movement of the unit allowing them to get to Objectives and allow the Acient Collector ability to take effect.
What is Finecast?
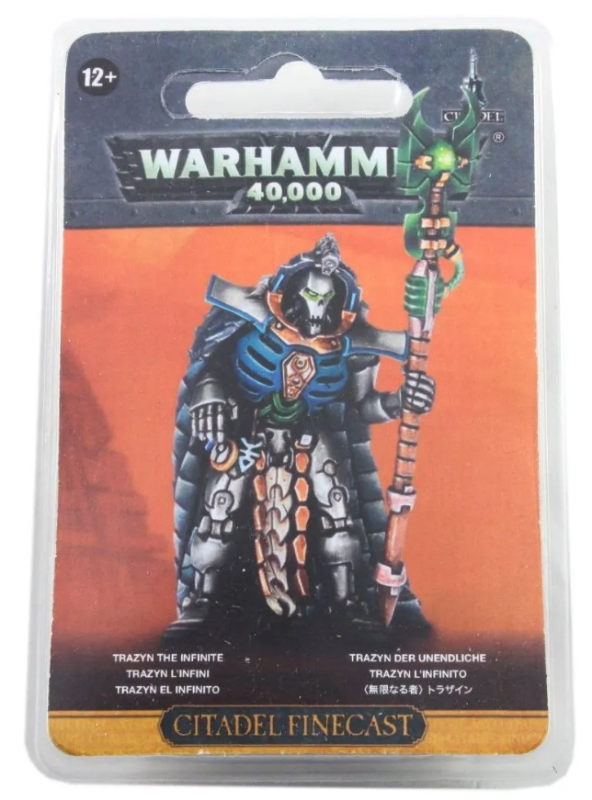
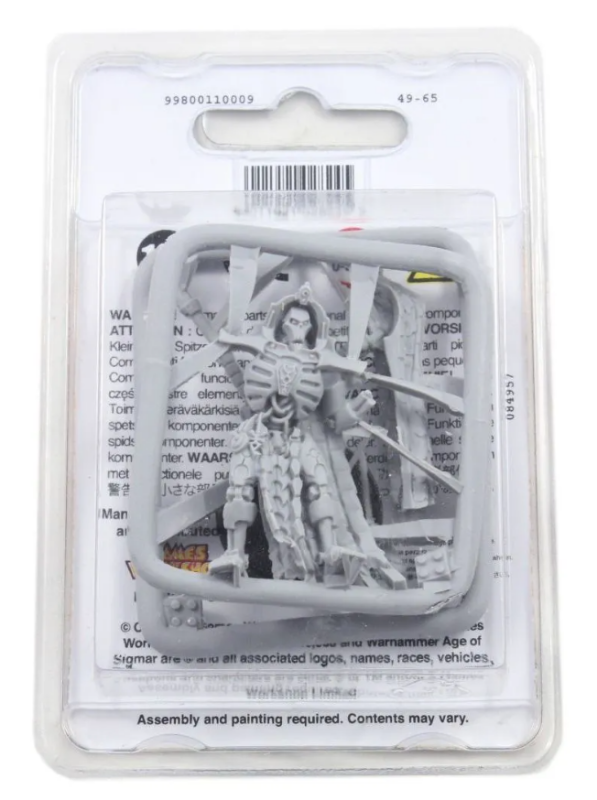
Fincast was a “soft” resin used by Games Workshop (GW) to replace their metal material for miniature manufacture. It arose during 2011 to reduce costs while GW was weathering a drop in revenue.
While the Finecast material did have advantages, it did not provide the “higher level of detail” it was promised too. Inconsistent quality was also a feature of these minitures, with some models containing pores, flash, and warping.
So why were these Finecast miniatures so bad?
From The Painting Phase video, Why does finecast even exist?, I took away that a constraint was enforced to use the existing machinery and process for metal casting.
I believe this decision contributed to the quality issues, because generally in manufacturing the material dictates the process. And by constraining the process, material performanceis also constrained.
An example of this is presented in my Blender Repaired blog, where I select my enclosed Flash Forge printer to print ASA.
Clean Up
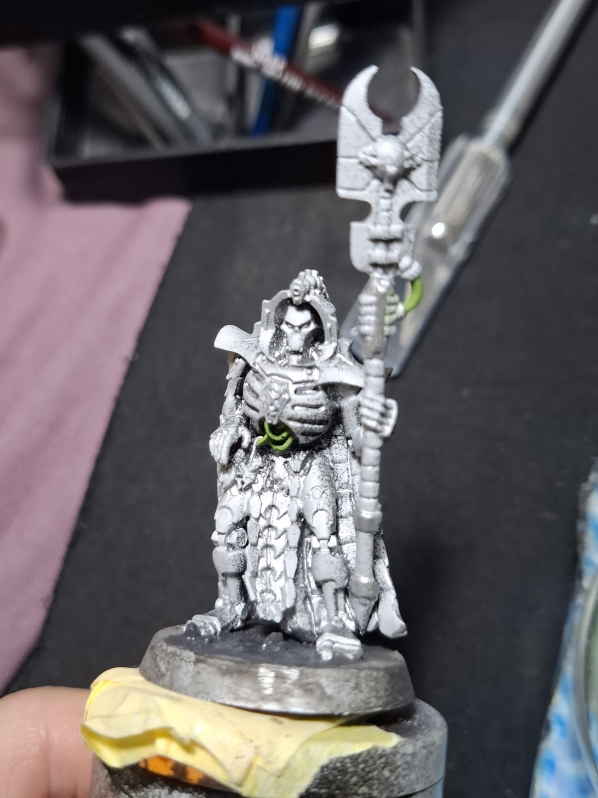
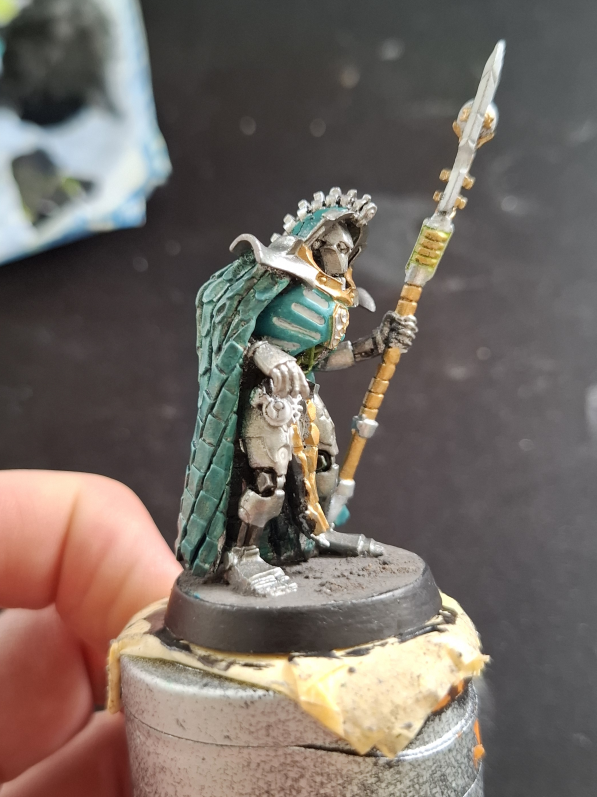
I definately got lucky with the model I received as I only had a couple of the common defects. The most prevalent defect was pores in the casting and thankfully most were on the rear of the model.

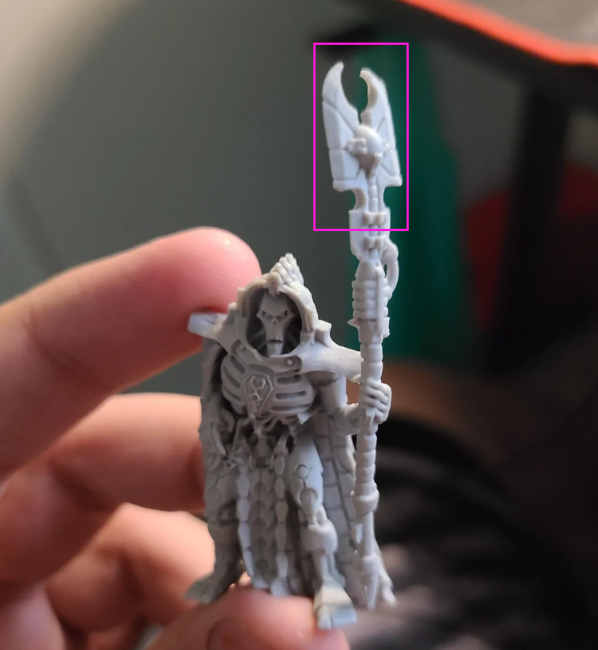
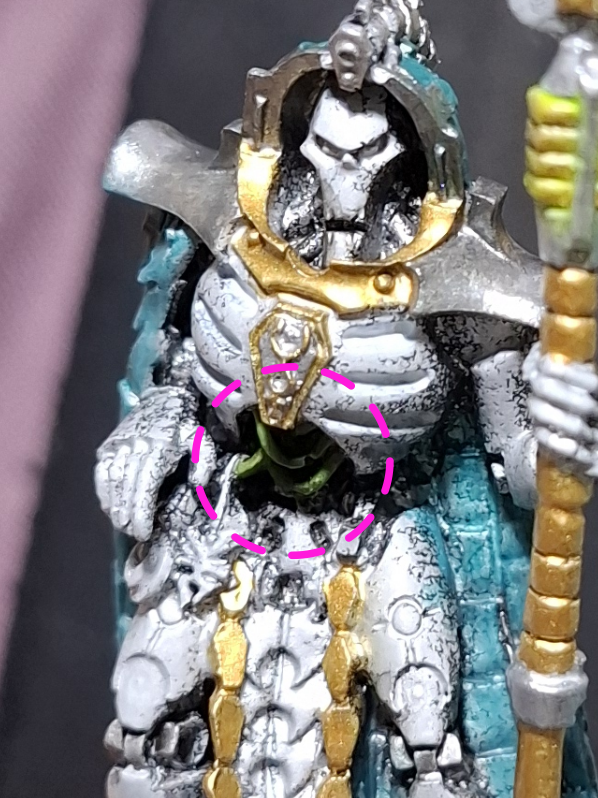
My model did have a gap in the cape as shown in the above images resourced from Reddit. Mine didn’t include the bent staff, but fate decided I would have my own staff themed adventures.

Above is my cleaned up model ready for priming. Even with minimum defects this step tool abit of work. The softer resin made cleaning up the nubs a slower process, because extra care is required not to remove too much material.
The model comes with a 25mm base, which I upgraded to a 32mm base to have our boy not looking so cramped.
I spend abit of time redefining details on his staff with my scribers, as this would be a focal point on the model. With this complete, he was ready for warm soapy water bath before painting.
Painting
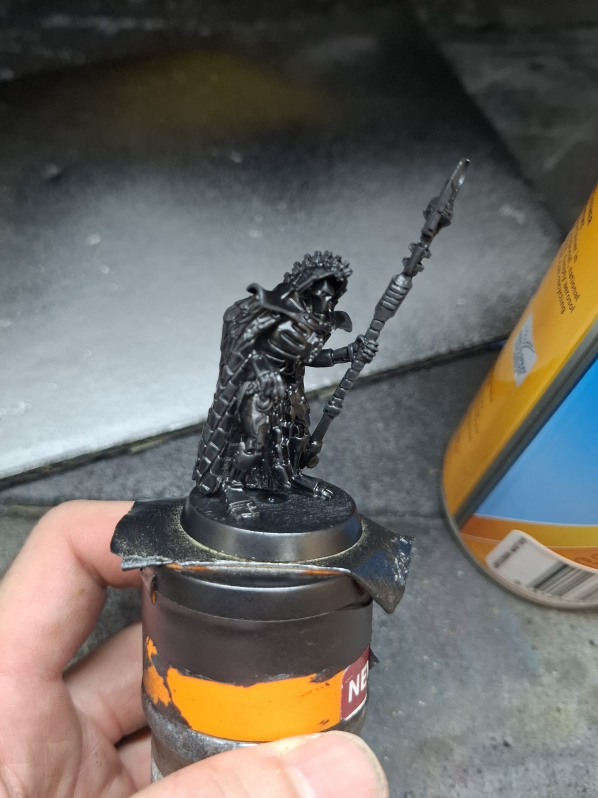
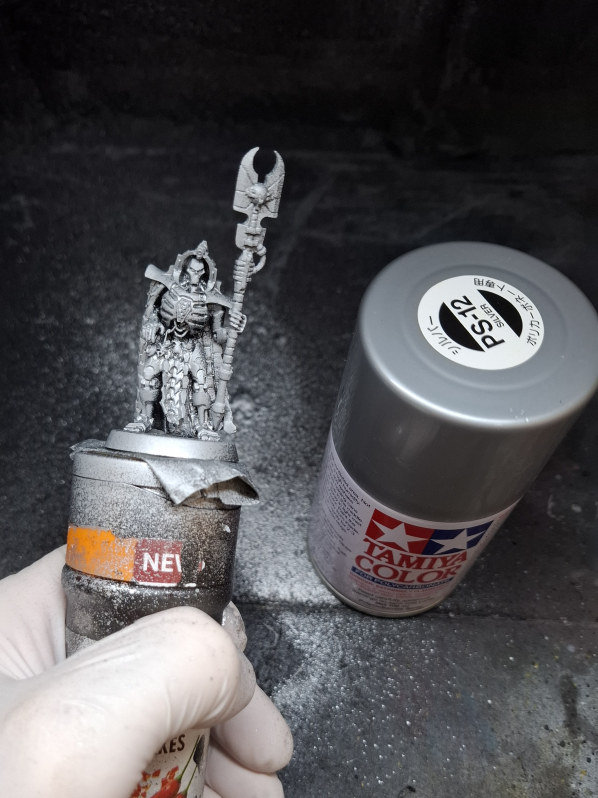
I didn’t find a need to change my priming process for the Finecast model and continued with coat of flat black. Next I gave the model a dusting of PS-12 Silver from Tamiya. This dusting was to help the silver parts of the model return to silver, while the partial coverage would retain the black in the shadows.
I started with the deepest parts of the model first, which were the cables in his abdomen. By starting here I avoided making mistakes with the green that I would have to cover up later. Next I painted in the gold on his collar, staff and loin cloth.
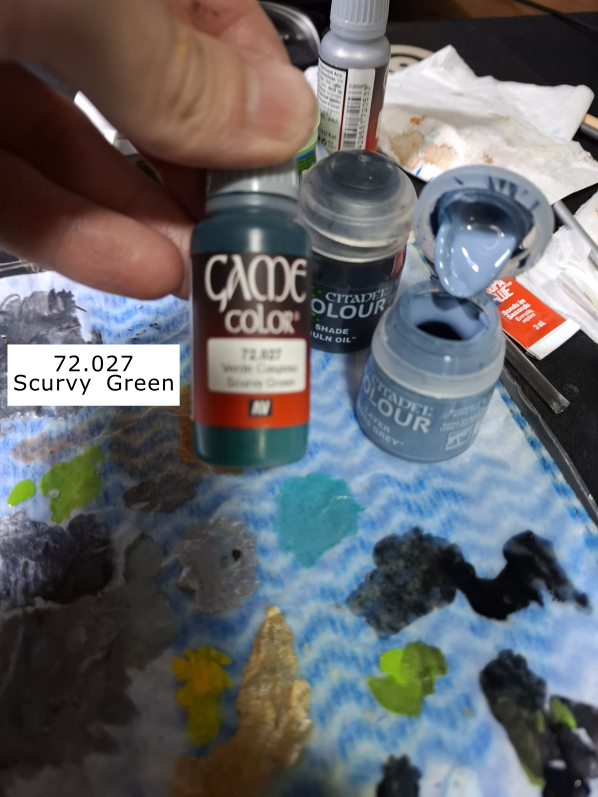
To paint the cape I made mix from Scurvy Green and Russ Grey. The Survy Green was quite fluid which helped keep the recesses darker, because its coverage wasn’t that strong. I attempted some dry brushing to highlight the rised parts, but this step did not show up that well in the end.

My first attempt at painting his chest turned out too dark and I corrected this by painting over with a lighter shade of the cape mix. I started my brush strokes under the arms and ended at his chest emblem, where I wanted the model to be the brightest.
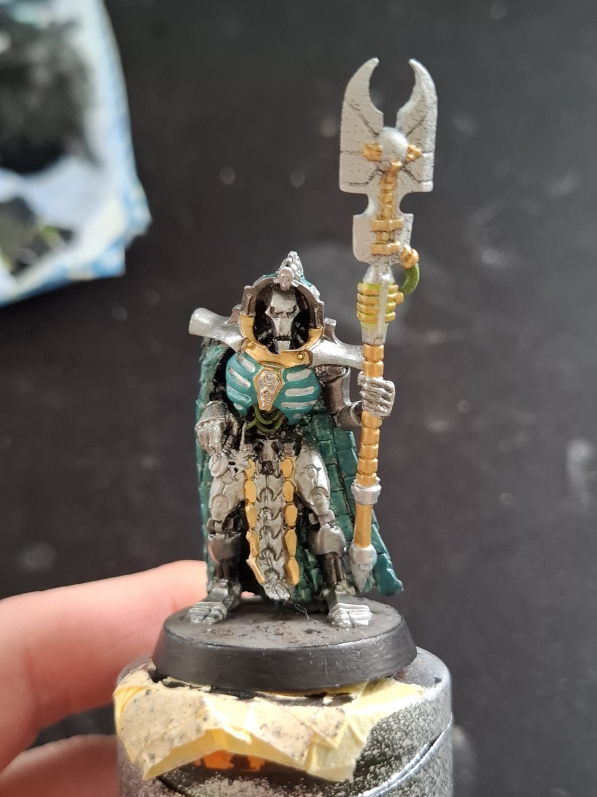
I aimed to have a glowing effect, on the chest, eyes and staff. This started with a base coat of white, then Moot Green. Next I mixed yellow with a liquifying medium to a heavier shade consistency and applied it by ending the brush strokes where I wanted it the brightest. The final pass was a light application of Tesseract Glow to help blend in the yellow.
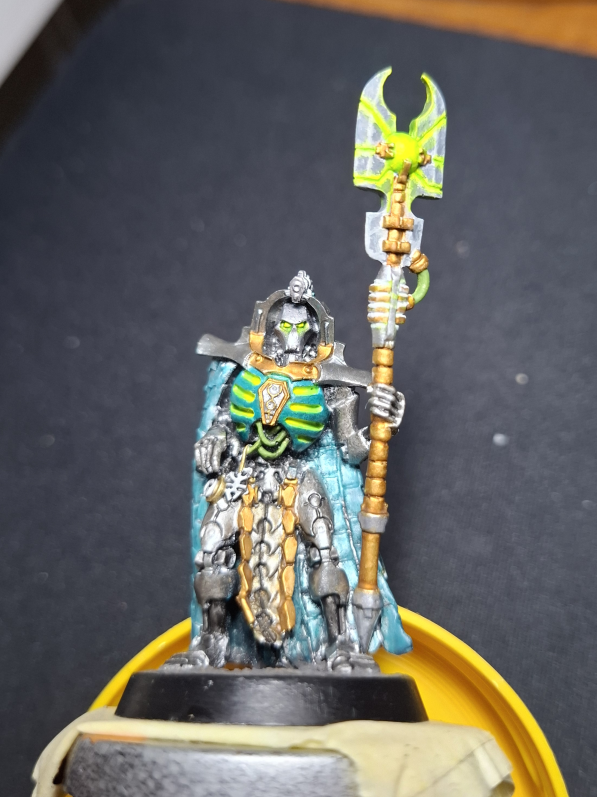
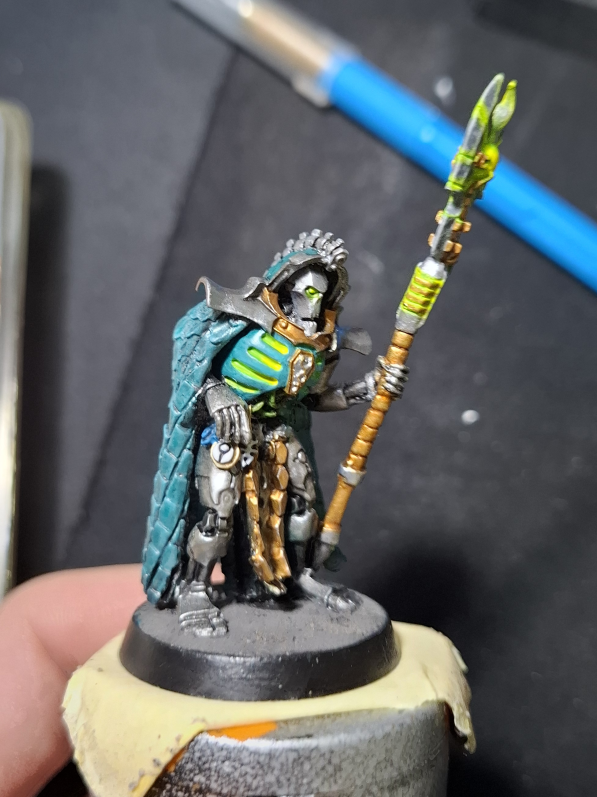
To finish the base I used a light coat of my DIY texture paint I made for my Skorpekh Destoryer Proxies. I then used a light grey and white to bring out the rised parts before painting a few smaller stones in tan and brown to create some natural randomness. Finally, there was a light coat of Nuln Oil to tie the steps together.
Repairing
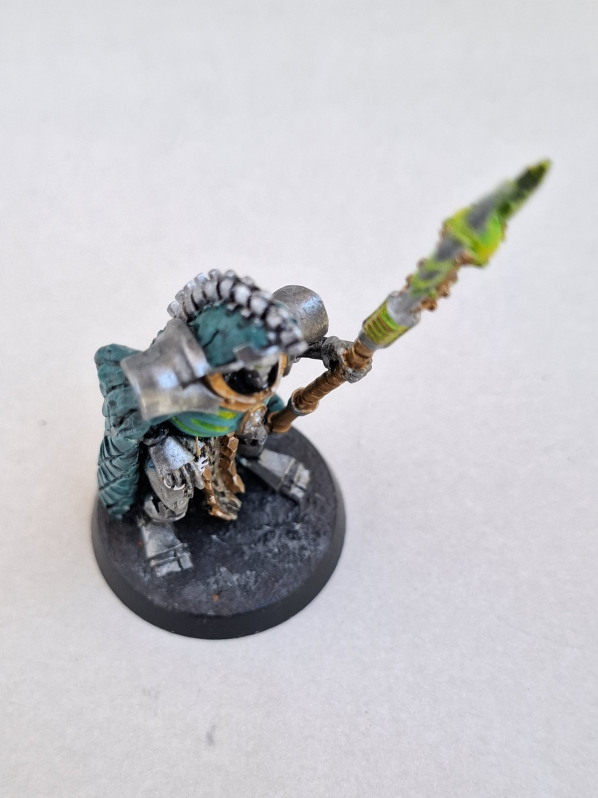
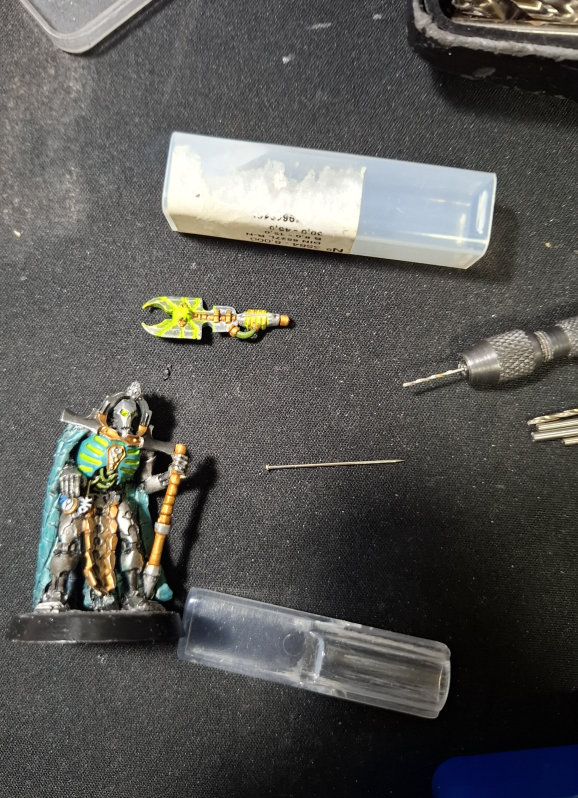
With the model painted and ready for its first game I thought this Finecast adventure was over. But, true natural randomness struck and I broke the staff while packing the model!
After a period of despair, I remembered that this was part of the game. Hot tip! To shorten the period of despair, take finished photos of projects ASAP, before moments like this can occur.
To start repairing the staff I gave the broken faces a light sand, not too much as I wanted to retain the recessed detail. Given the small contact area available for gluing, this repair will need pinning for strength.
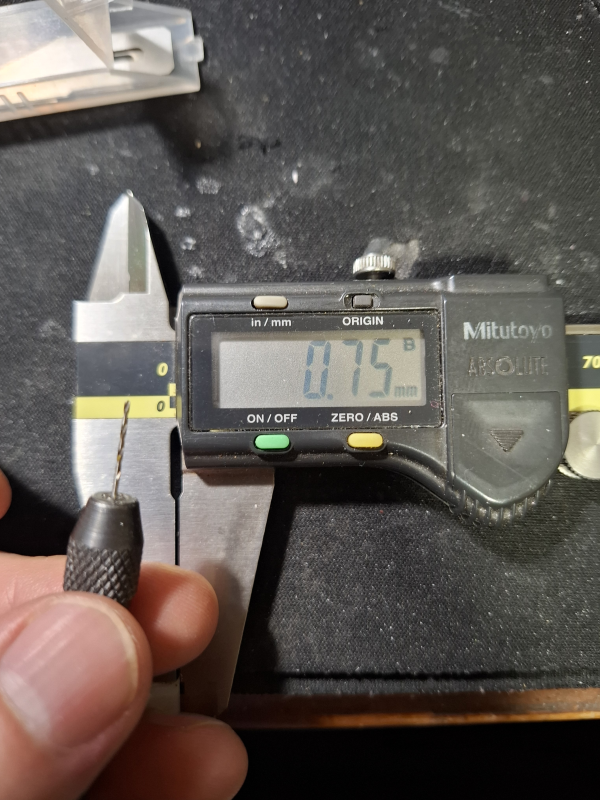
For the pin I trimmed a sewing needle to length and used a 0.75mm drill that matched the pin diameter.
To help centre the hole to the staff, a sharp hobby blade can be used as centre drill to start the hole. Getting the holes centred is critical on thin parts as misaligments are move obvious. I’m also trying very hard to avoid any repainting in this case.
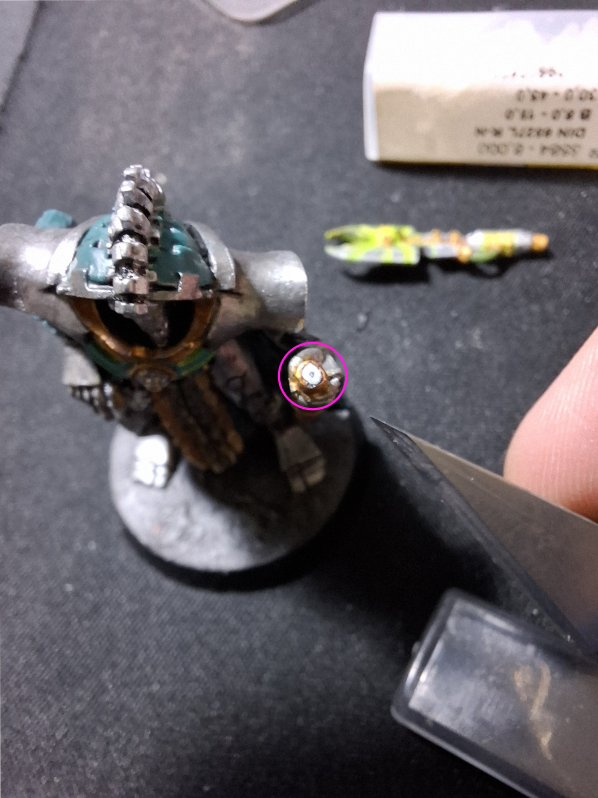
A word of caution when inserting the pin, side cutters can leave a sharp edge, so avoid pushing too hard with your fleshy appendages! Instead try tapping glenty with a flat face on the side cutters, or redrill the hole if the fit is too tight.
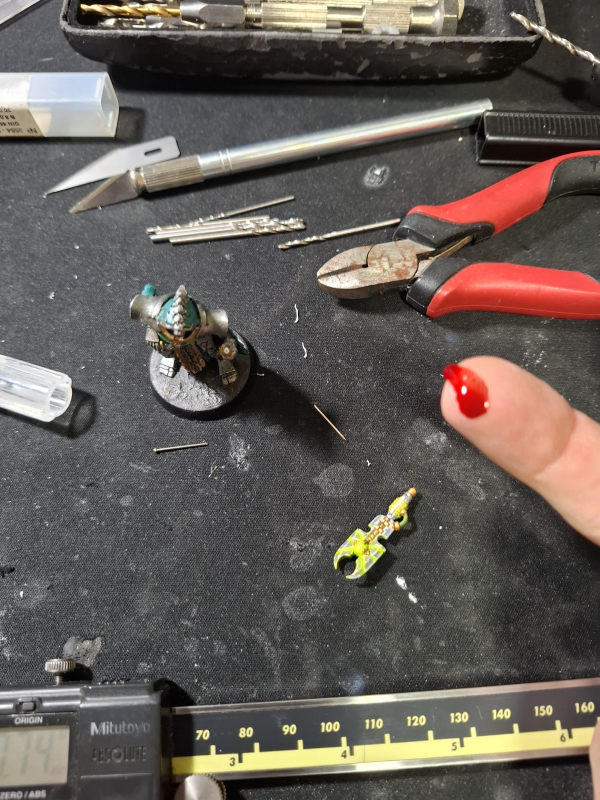
Super glue is suitable for Finecast, and I applied it to the pin, and faces, quicky cleaning up any excess.
Having navigated this detour with care, I was happy with the repair results and the slight misalign is only obvious when viewing from the side.
Conclusions
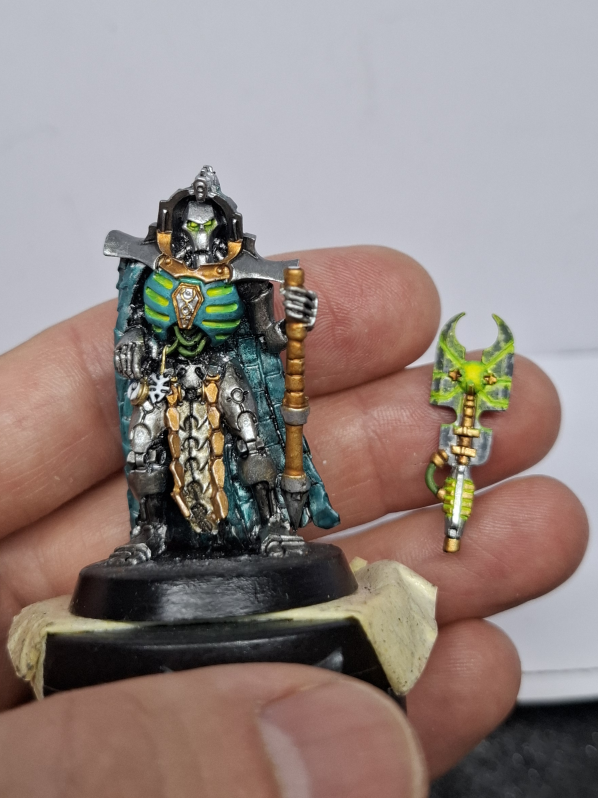
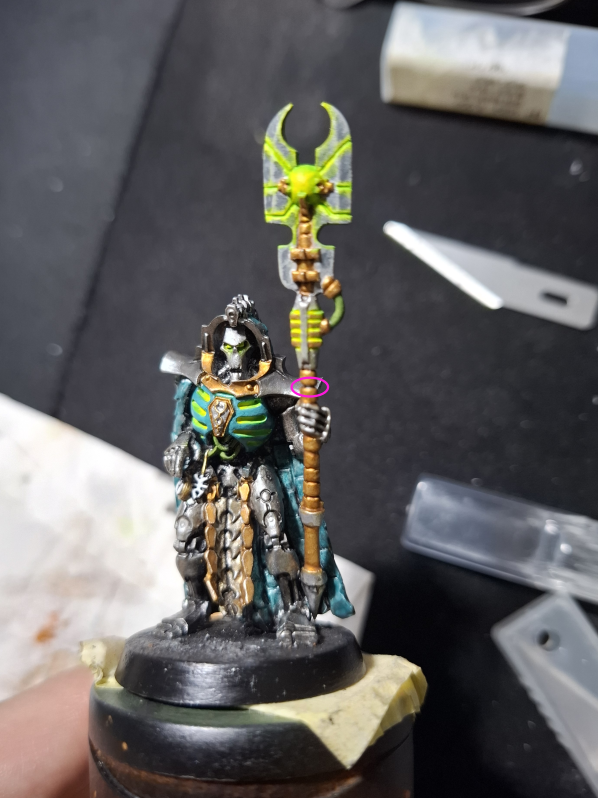
Here is our boy Trazyn all painted up!
Reflecting on the goals I set, I feel I scored around 50% I definately deviated from the box art in a few places and only scored on this obective with my highlighting on the gold parts.


My dry brushing on the cape to highlight the raised parts was a swing and a miss and I need to attempt his again for redemption. I’m most satisfied with the glowing effects, especially on the chest.
Make our boy proud and check out the gallery, were there are more finished photos and WIP progress shots!