
I decided to paint up an entry for the Queensland Model Hobbies Expo (QMHE) 2025. Last year I entered my Zaku Warrior, and to make the most of the 2025 expo I chose to enter the science fiction (sci-fi) category.
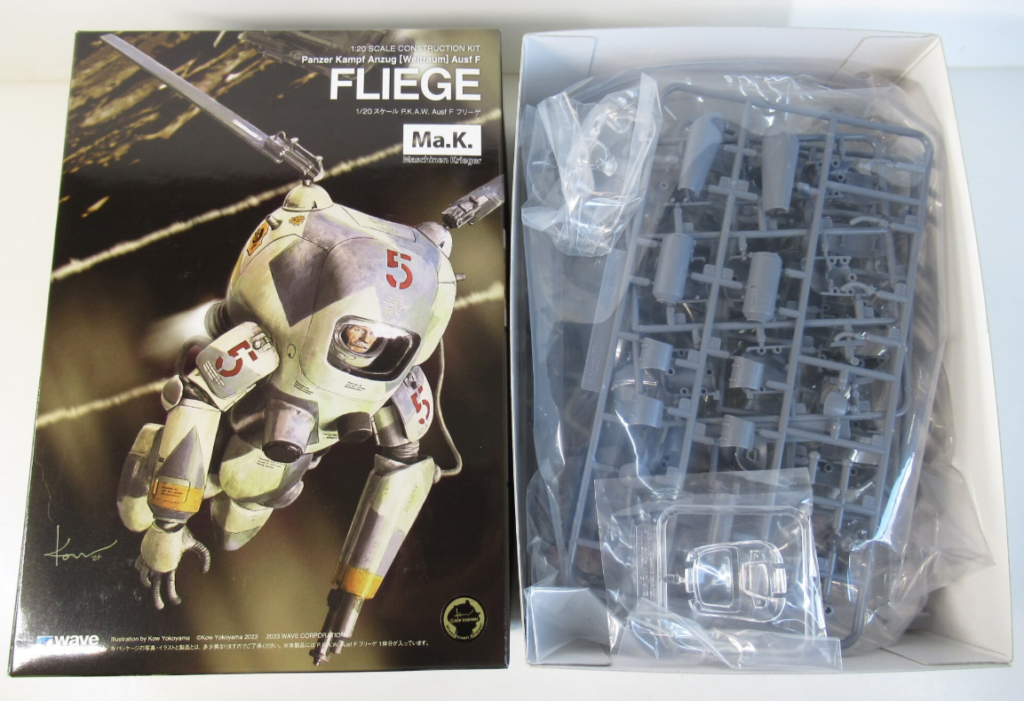
My subject would be the Maschinen Krieger (Ma.K) 1/20 FLIEGE kit by WAVE.
I was really impressed by the sci-fi entries from last years expo, so I set myself objectives for the build to challenge myself, and create a competitive finish on the kit.
Here were my Objectives:
- Display the kit in a vignette set in space with floating debris.
- Mask and airbrush a camo pattern.
- Create soot around the nozzles using Tamiya Weather Master.
- Create small physical damage.
- Use an all over wash on the kit.
Now that we’re not modelling aimlessly, we’re ready to start!
Contents
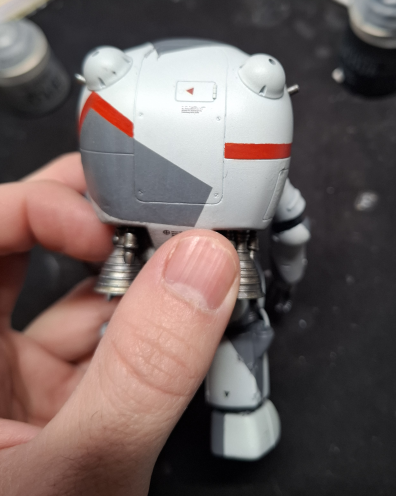
Clean Up
Ma.K kits have been manufactured by multiple companies, but when it comes to clean up the armoured suits have a similar flavour. Their limbs are a sandwich construction with a seamline along the length of the parts. While their torsos are typically four major parts, with two rear halves, a front halve, and a hatch.
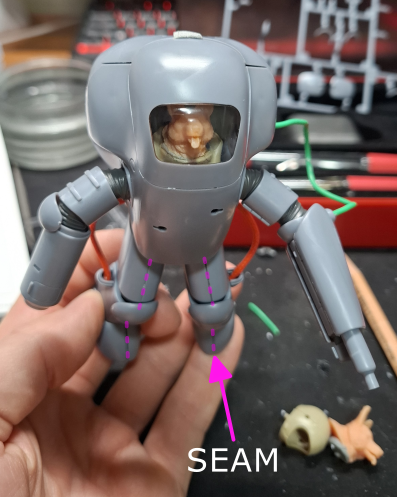
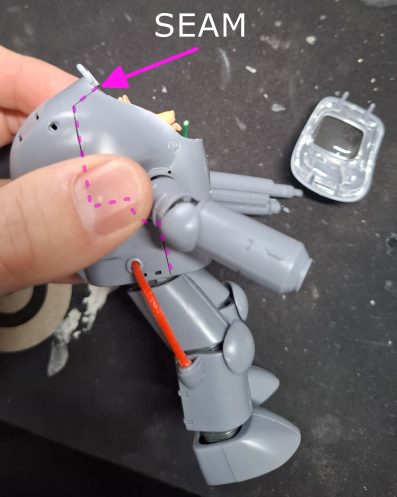
The torso seam where the rear half meets the front was the most exciting to clean up. The upper part that runs down and ends at the arm socket (under my thumb) was turned into a panel line. Which leaves the lower part that runs around the arm socket and down to be removed.
Another feature of the Ma.K armoured suit kits are polycap joint coverings. These have a moldline that is tricky to remove because of the polycap material. I choose to sand mine with the help of a knife blade to get between the details.
3D Printing
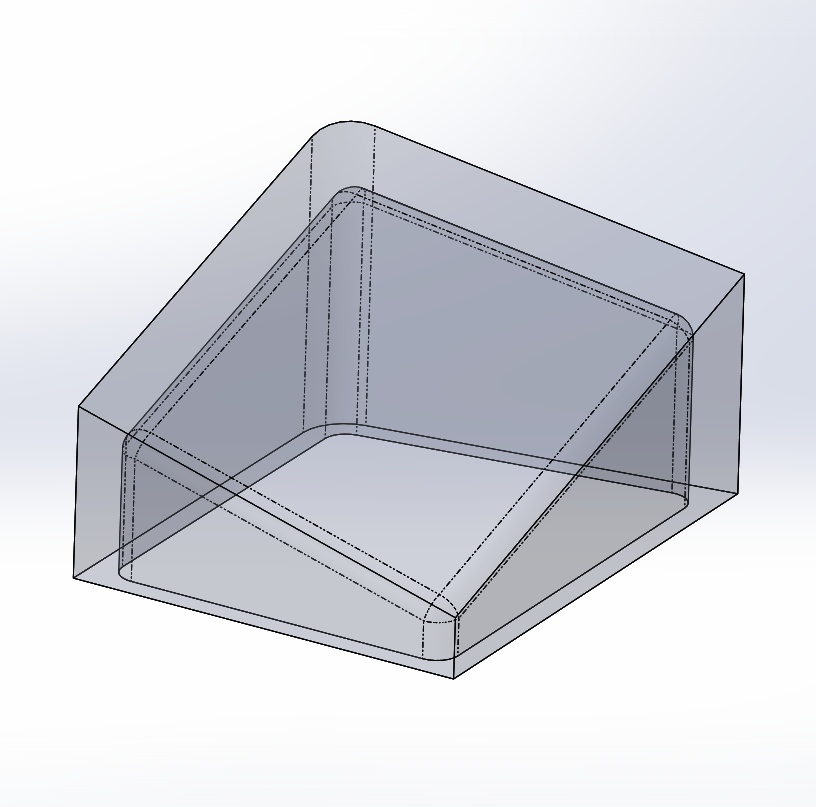
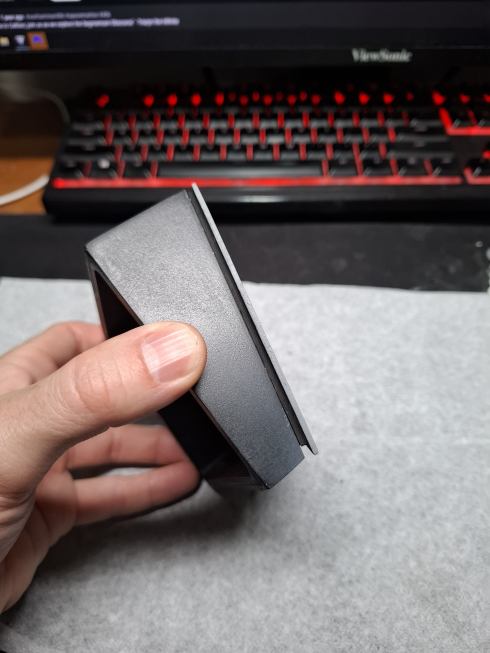
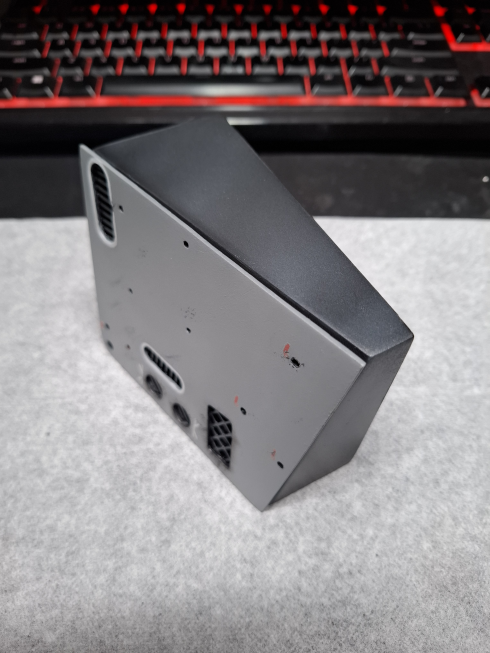
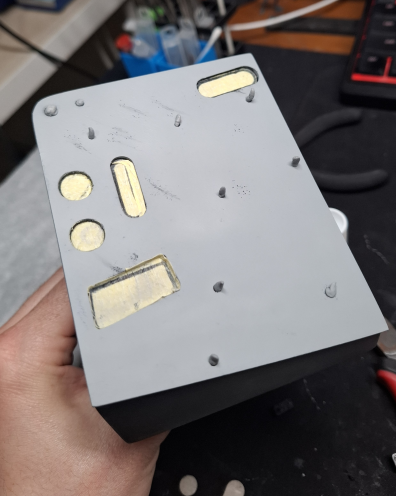
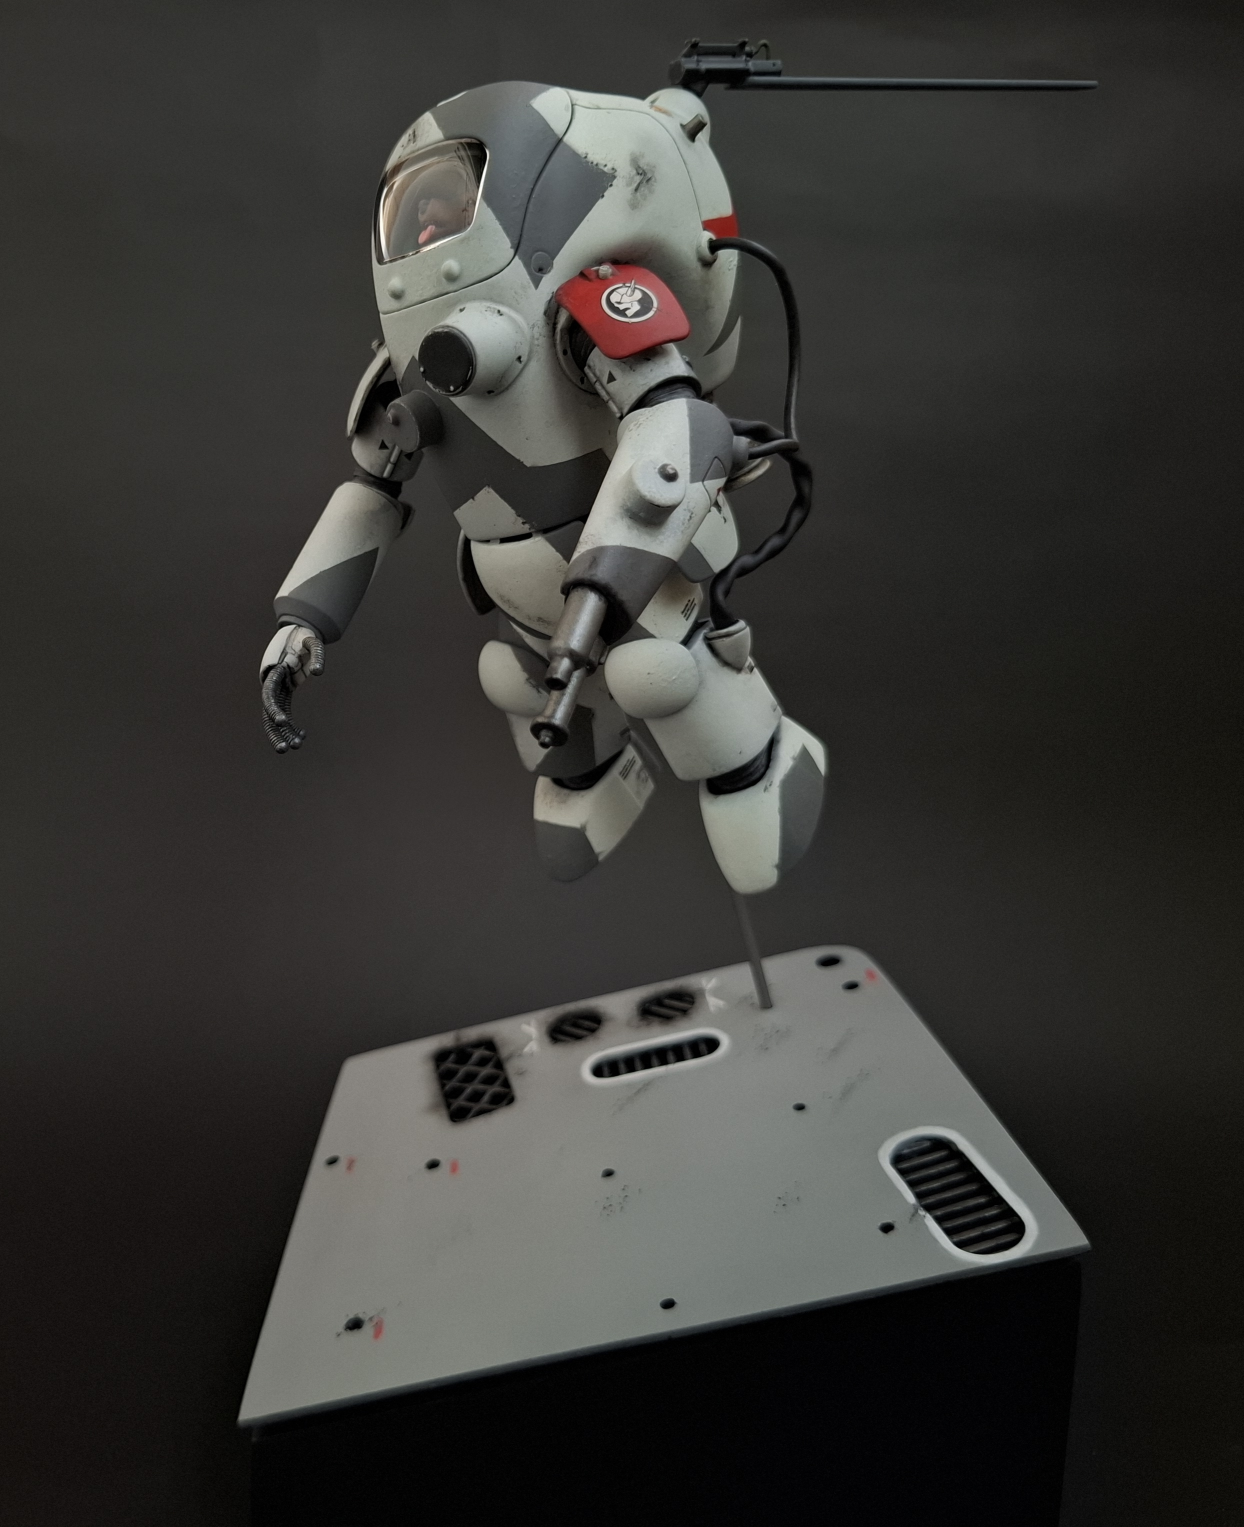
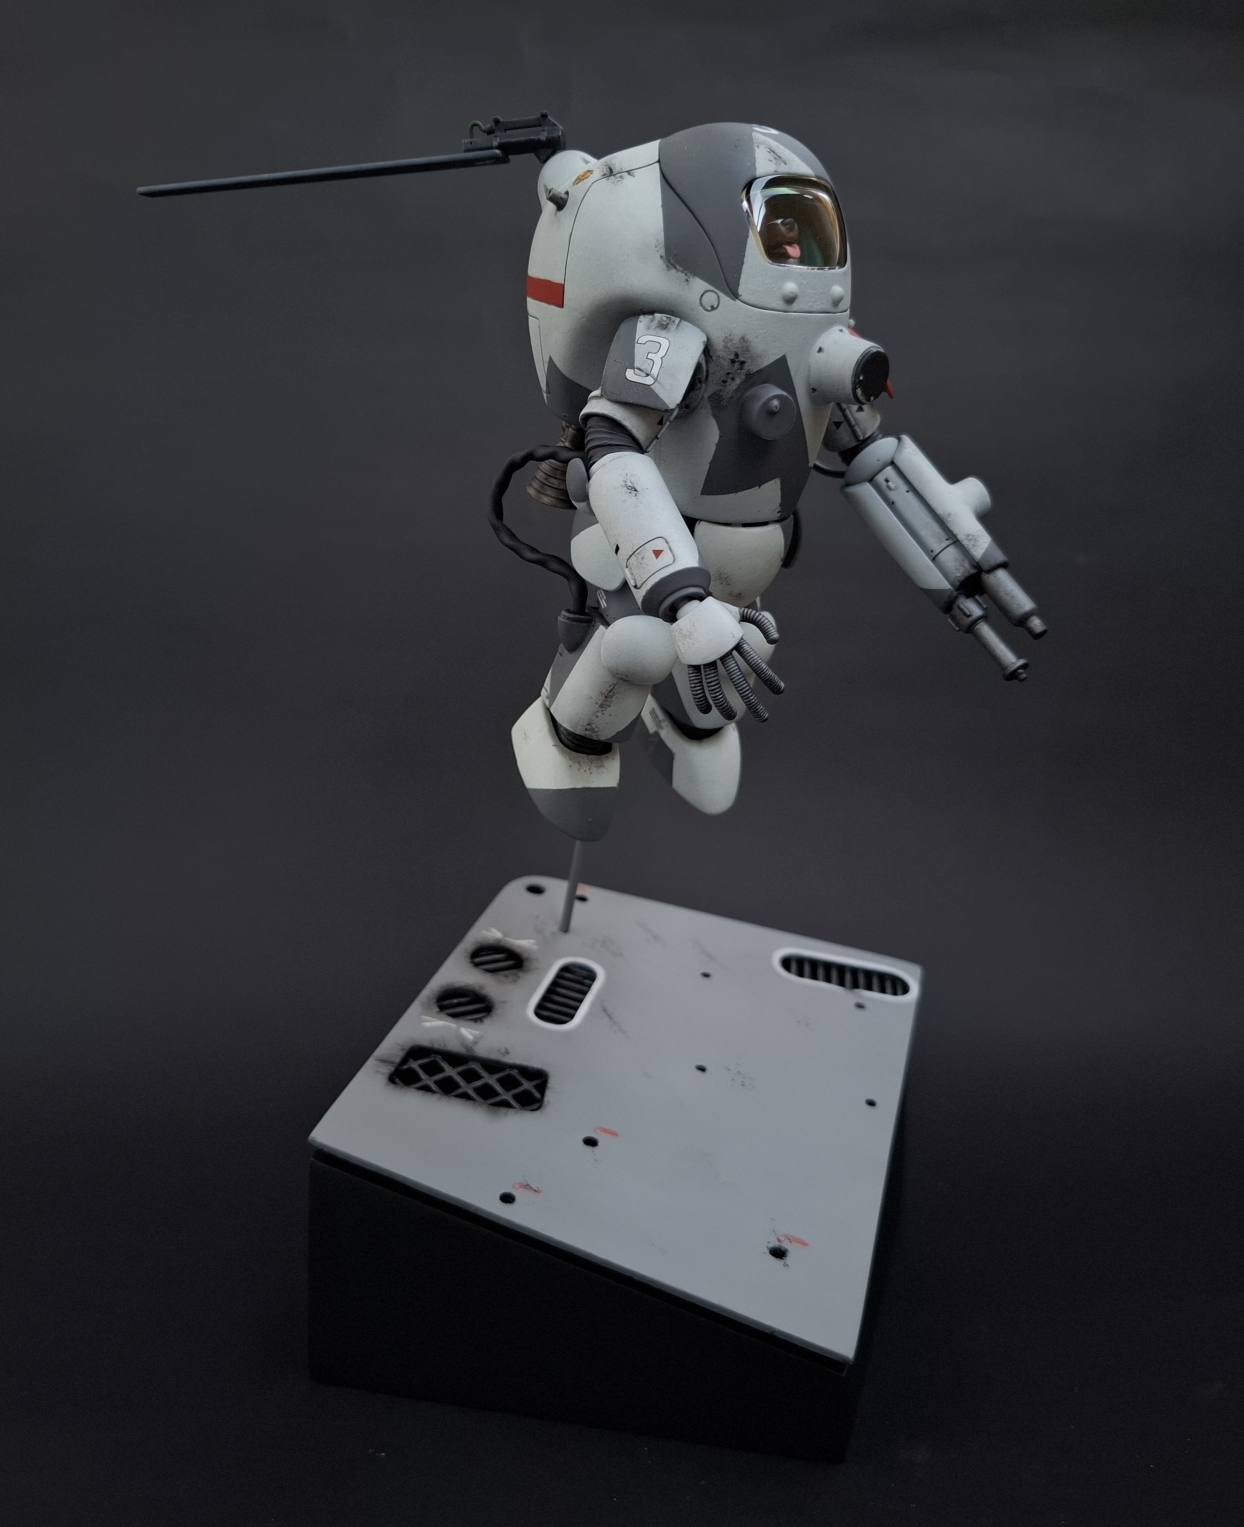
3D printing supported creating the vignette for my entry along with 3D modelling and recycled failed prints. When we see objects floating in space they’re usually at odd angles. To recreate this I modelled a base with multiple angles.
A failed print salvaged from the bin at work had the perfect details for a piece of floating debris. I then used leftover rafts to construct the mesh details.
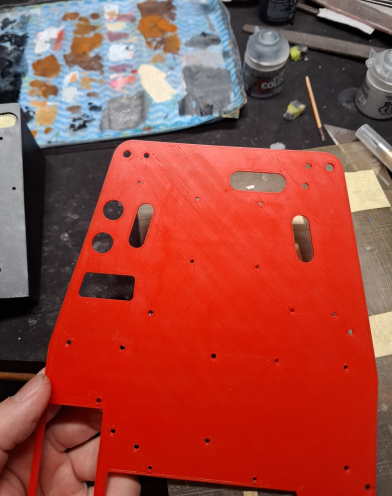
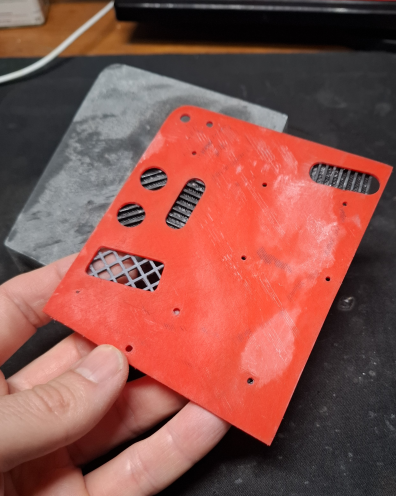
from Leftover Rafts
To help simulate the floating effect I modelled a trim to hold the top surface off the angled base.
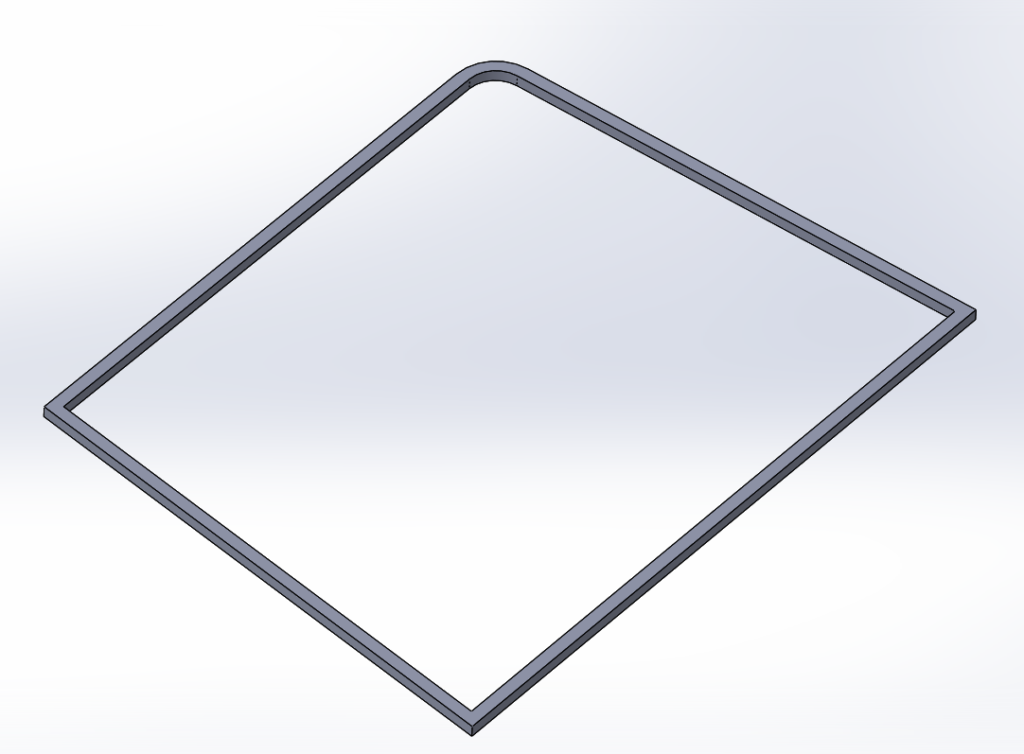
With the trim in place the detailed top surface sits off the base, helping capture the floating effect.
Customizations
With most of my objectives focused on the finish of the kit, I kept customizations to a minimum. I replaced the original cables from the kit using the same techniques from my HG Sinanju build to create the cables.
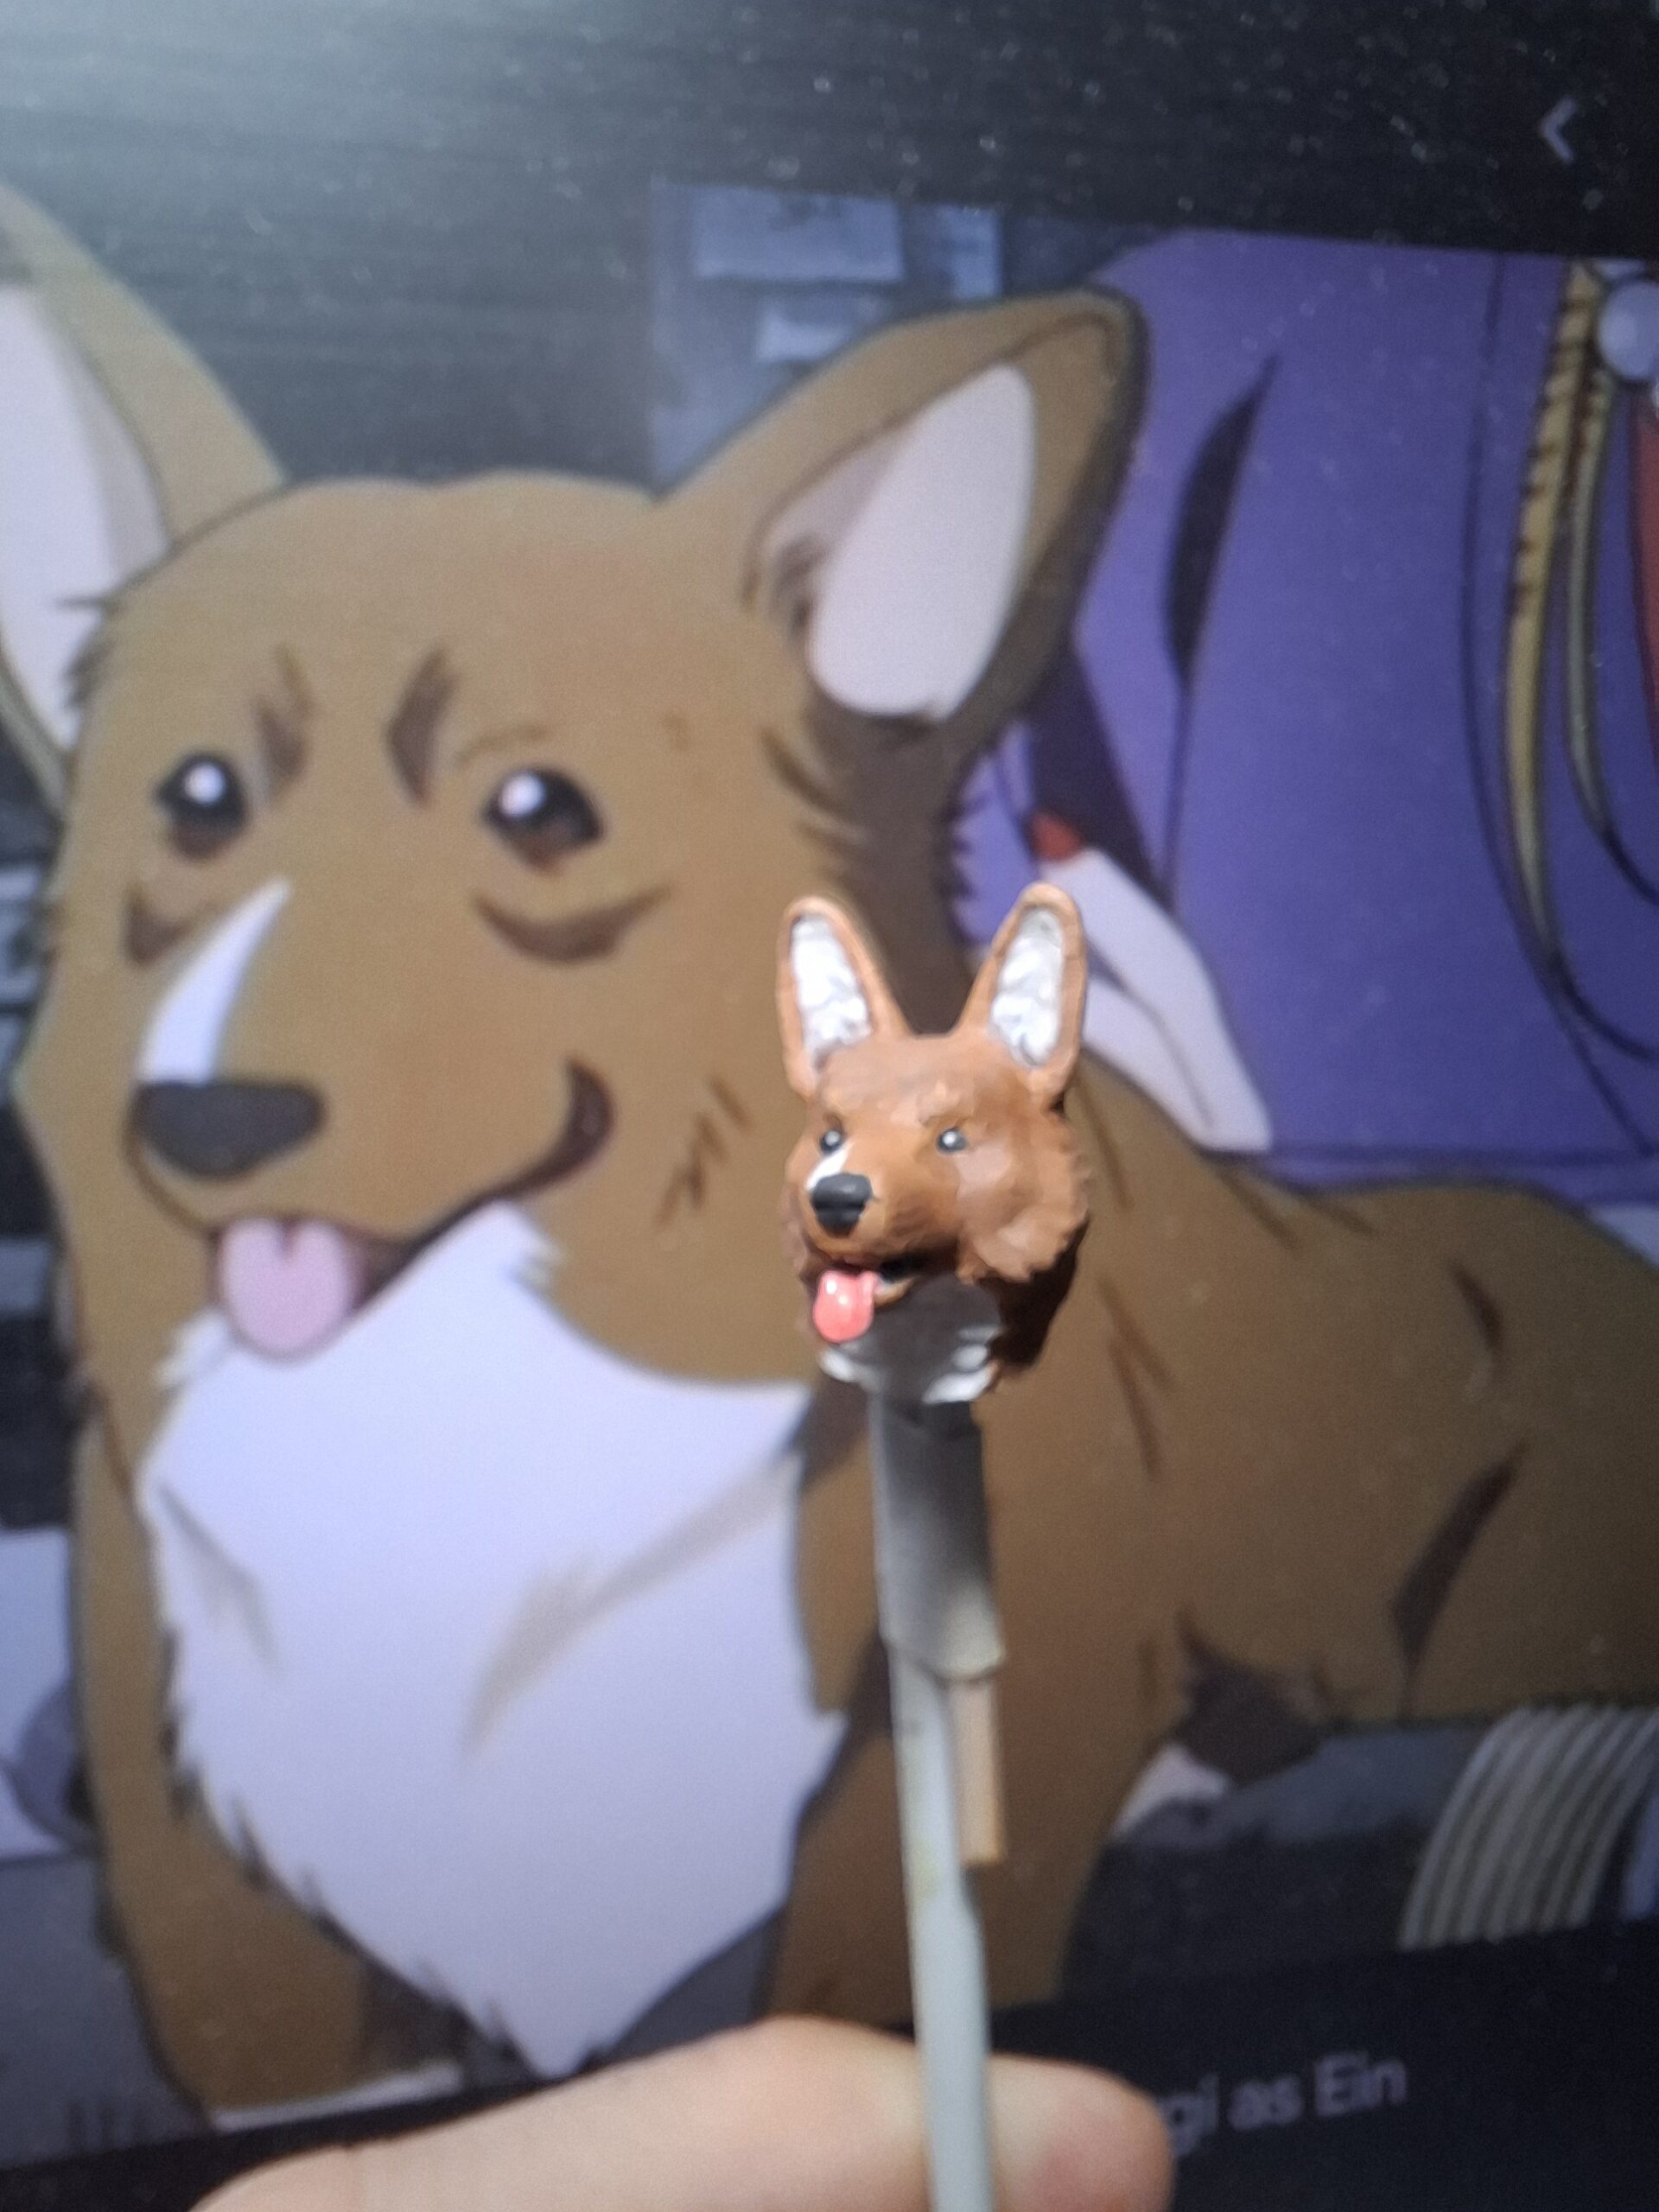
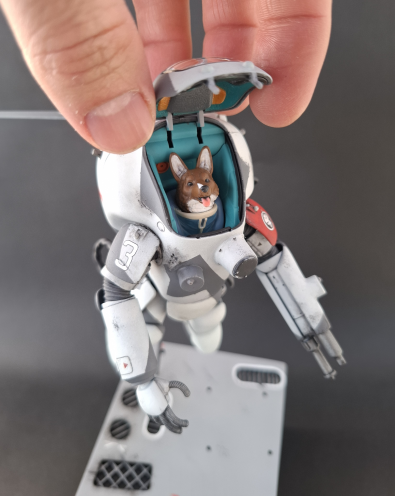
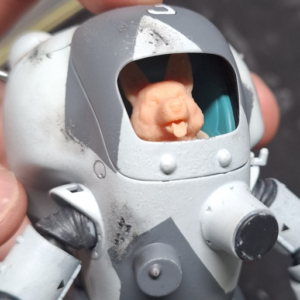
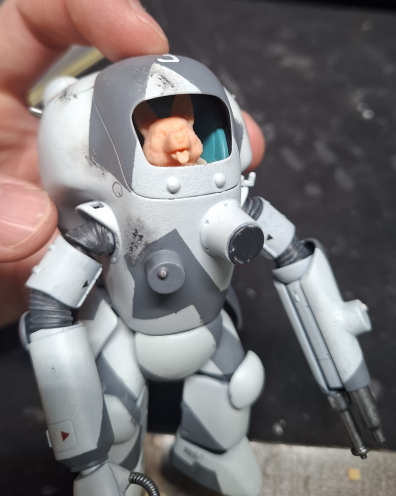
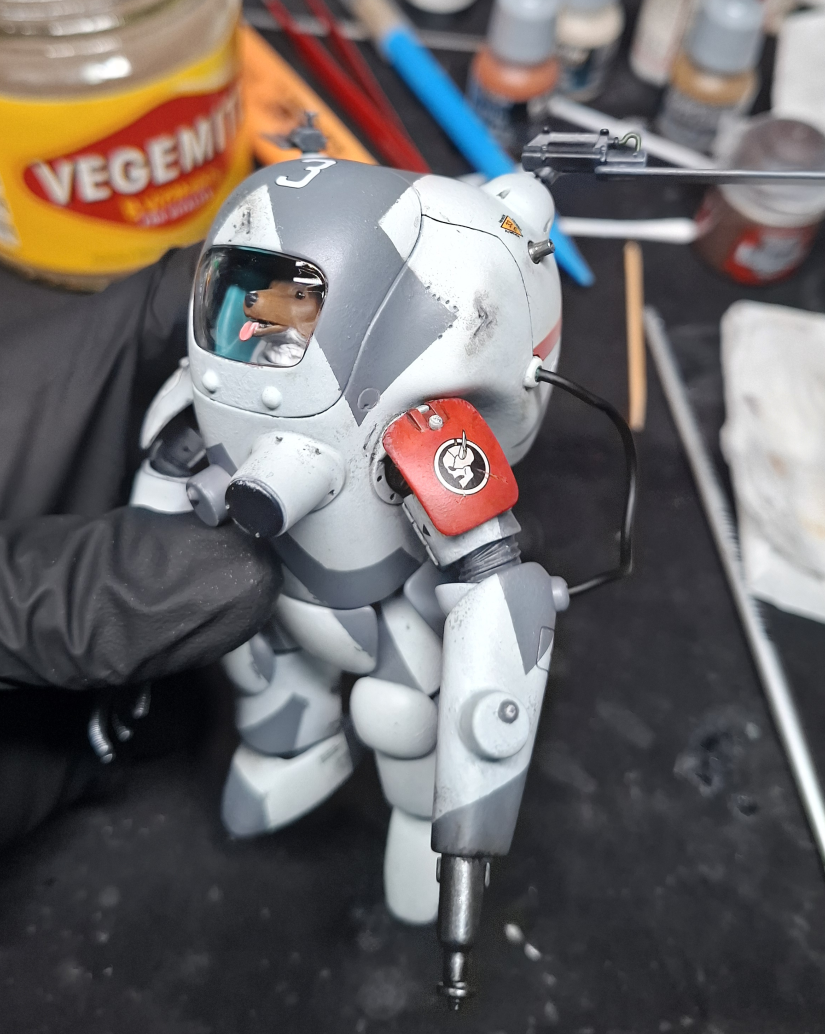
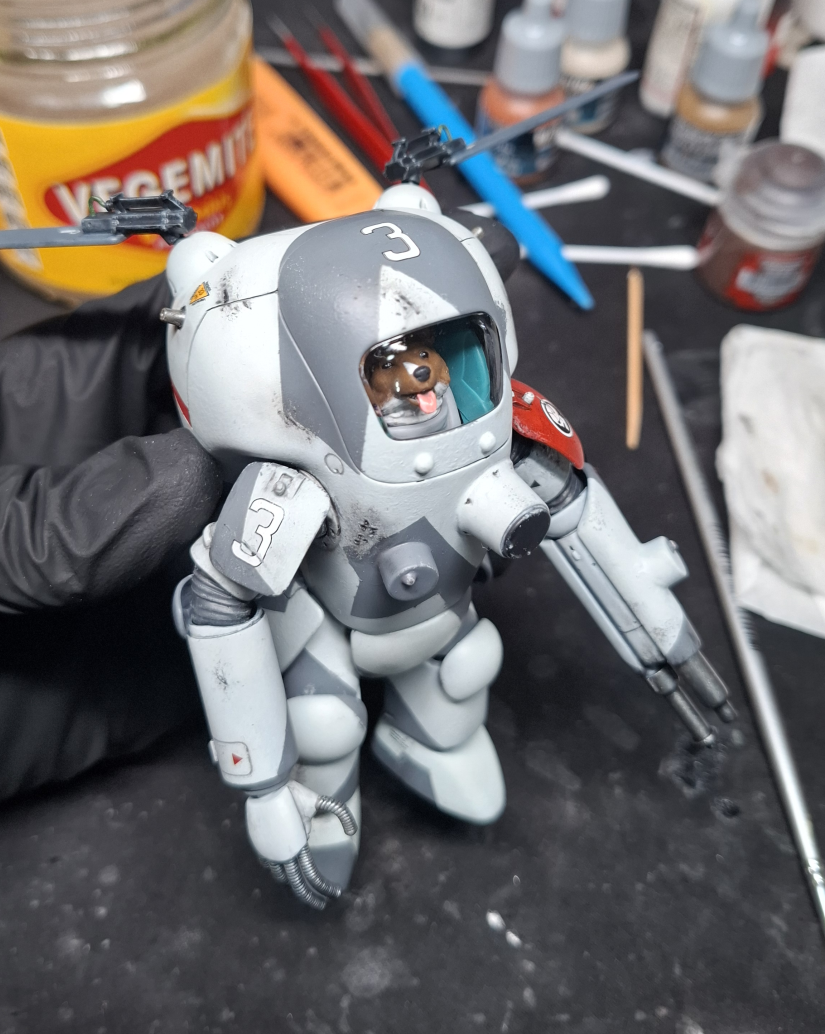
I was not confident in my skills to paint the pilot’s face, so I swapped it out for a corgi head. With this customization I was aiming to add a playfull element which would contrast against the destroyed floating debris.
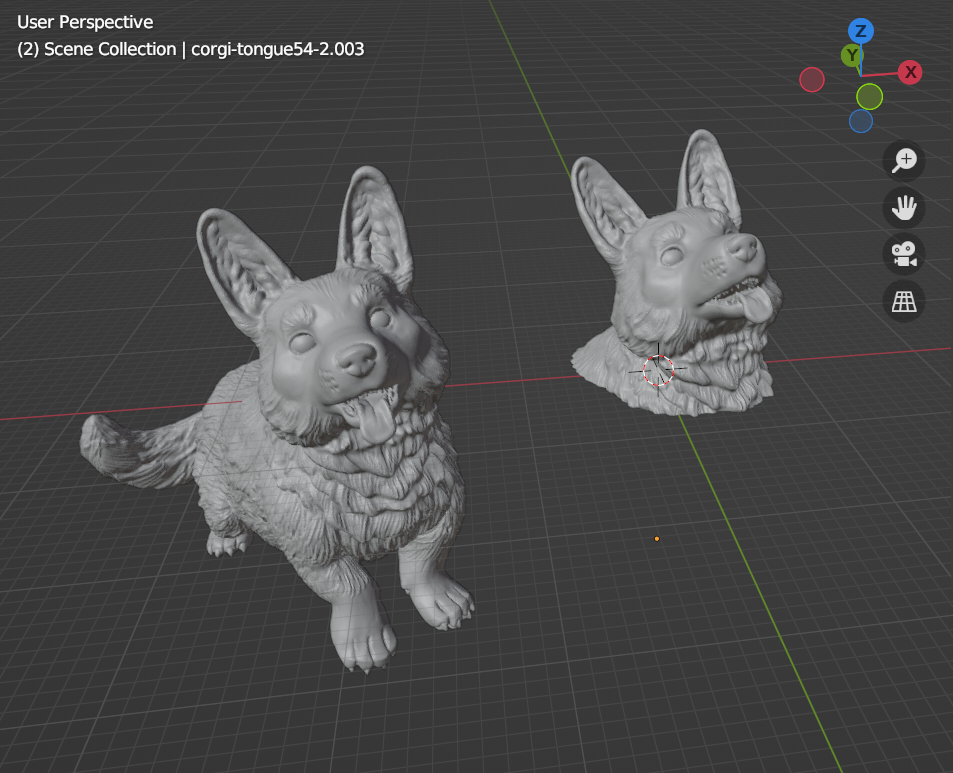
The corgi model I used was sourced from Thingiverse by the designer Calrais. I only need a portion of the model so I imported it into blender where I used the boolean and scale tool to edit it. These are the same tools I used for my 3D Printed Scarab models.
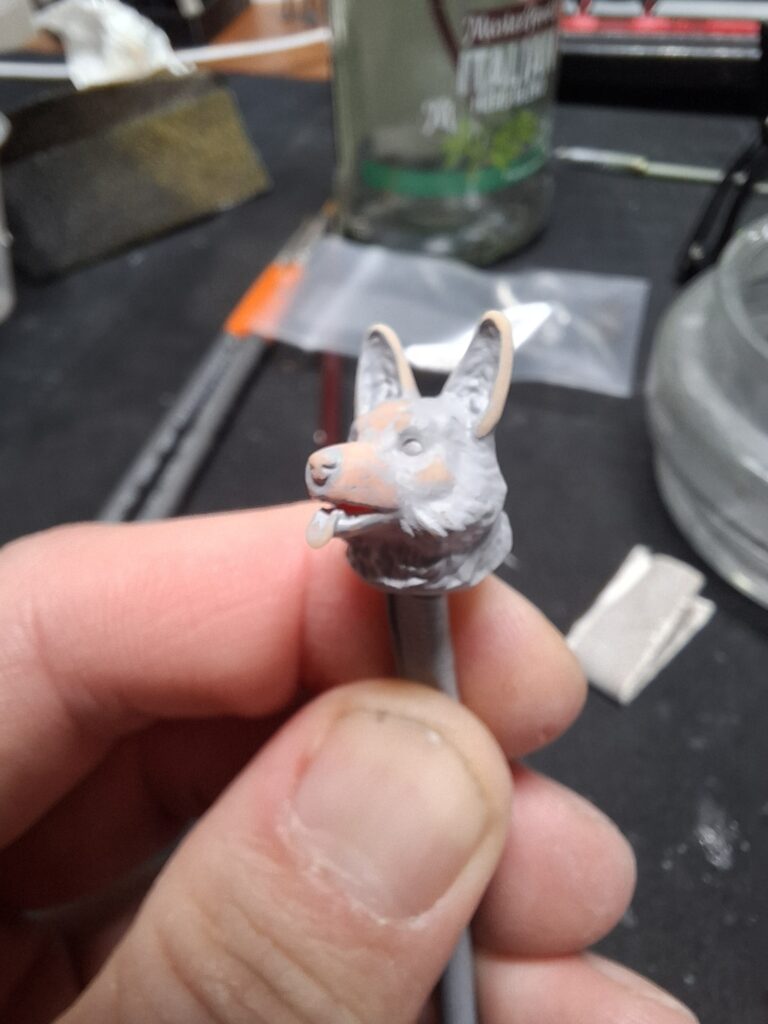
To capture the detail in the model I phoned a friend to resin 3D print the head. The great work done to calibrate the resin 3D printer shows in the result, as there was minimal clean up required after a round of priming and sanding.
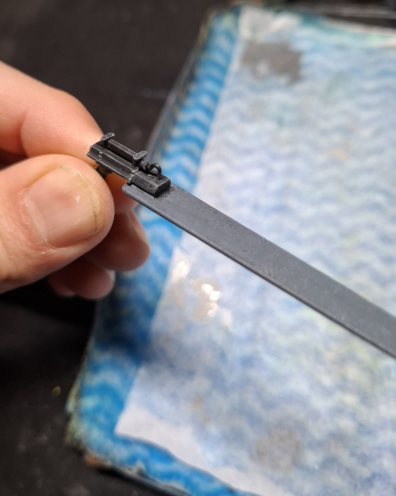
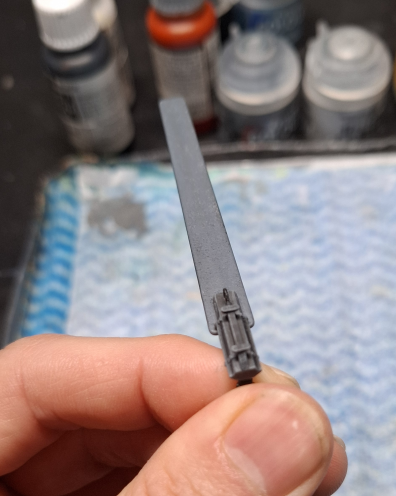
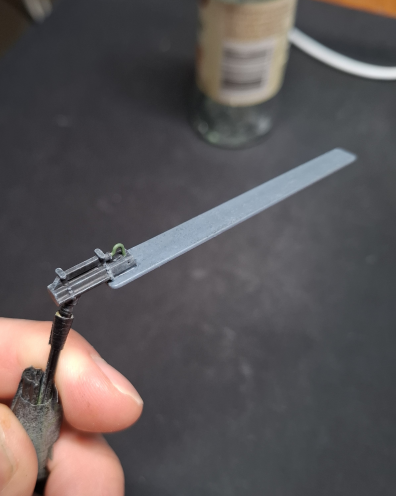
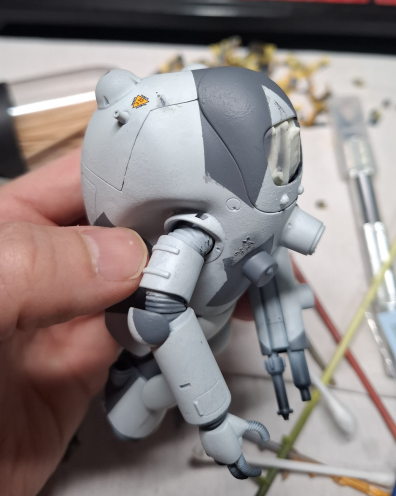
Adding Physical Damage
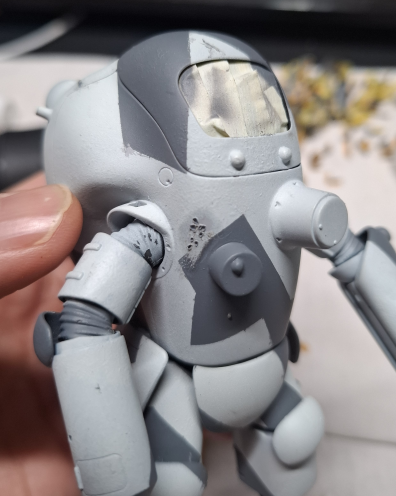
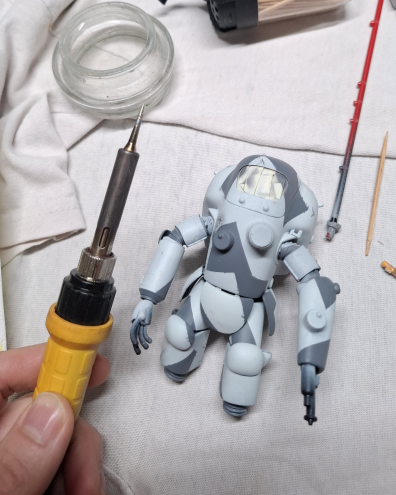
Adding the physical damage to the suit happened after the satisfying unmasking step. This allowed me to use areas I didnt mask correctly as guides to place the physical damage. I was going for a mix of shrapnel and glancing strikes using a point tip on my soldering iron.
Painting
Base
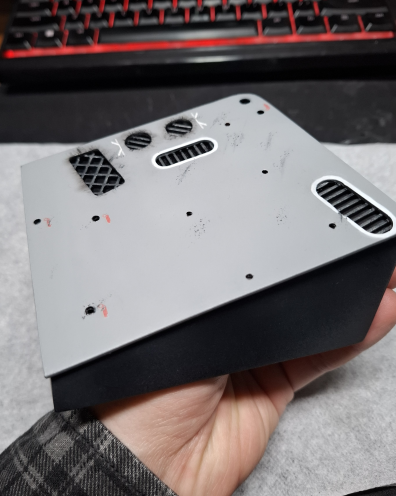
Painting 3D prints ususally begins with sanding, and this base was no exception. Along with sanding there were a couple rounds of priming black.
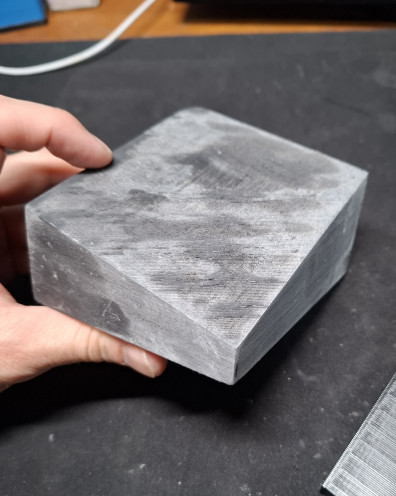
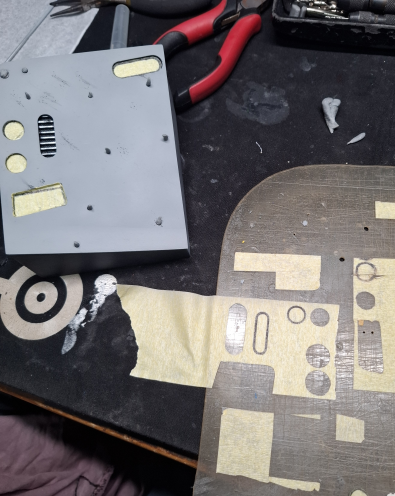
The top detail was going to get a coat of grey with the airbrush so masking was needed. This was a great warm up before embarking on masking up the suit. Regular masking tape and BluTack were the weapons of choice for the base.
To finish the base I applied decals and painted a white trim around the slot shaped vents. Then I did abit of weathering with paint and pigments, concentrating on aligning the direction of the larger weathered areas.
Pilot (Corgi)
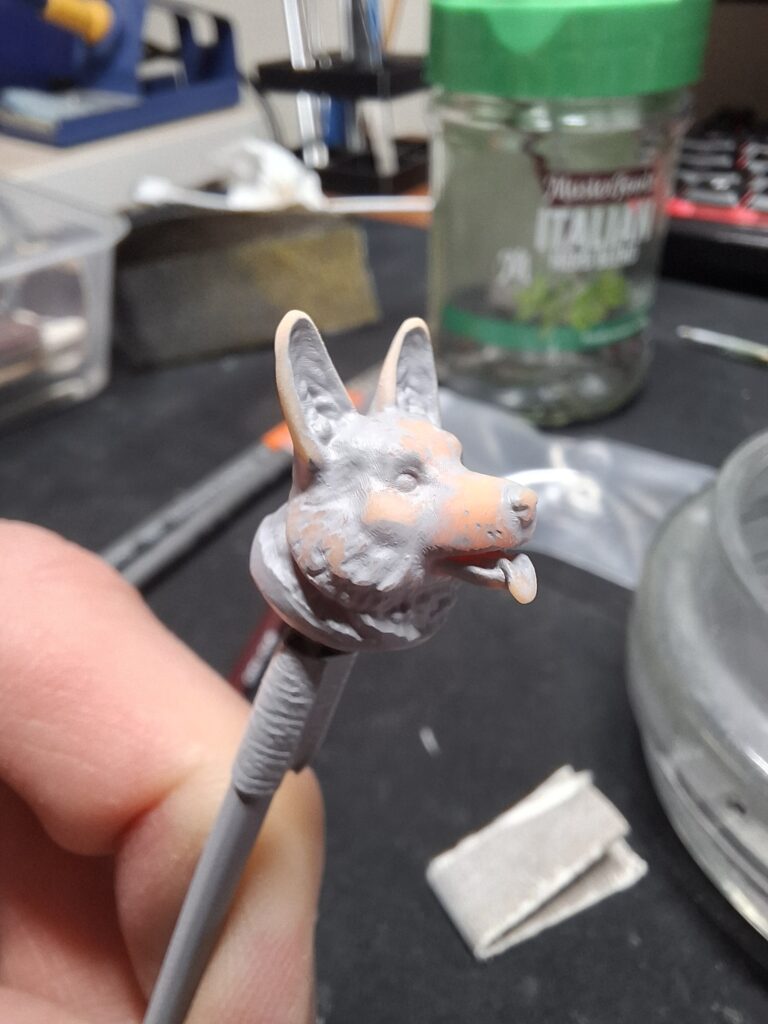
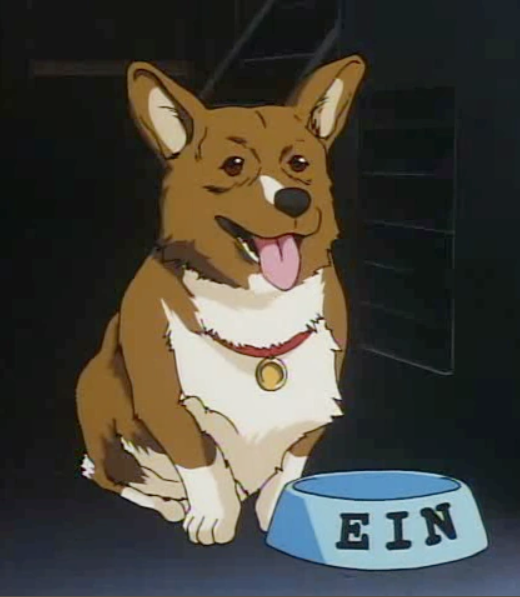
To start painting the corgi pilot I found myself a reference of Ein from Cowboy Bebop.
Next I picked out my paints and started on a tester pilot to get the order of operations worked out. I started with the inner/deepest details, and wrote out the list below for where I used each paint mix.
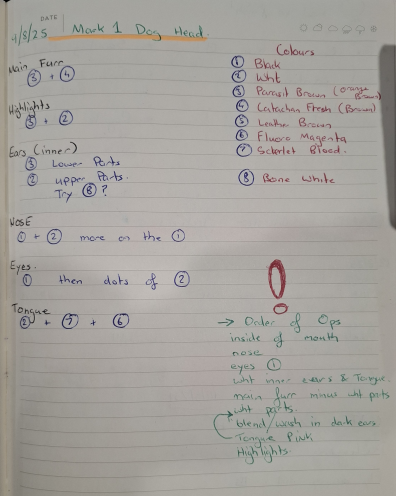
Completing a test pilot helped me execute the final pilot alot, and I owe having spares to 3D printing! Below are the WIP photos from painting the pilot.
Corgi Pilot Gallery


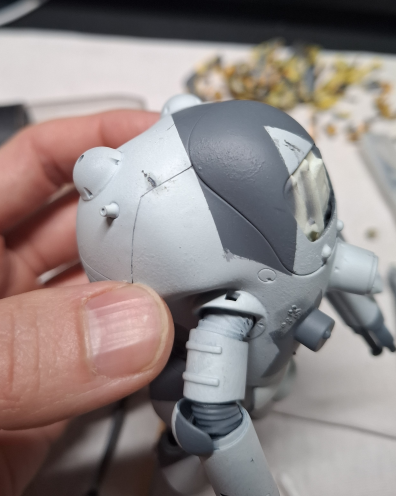
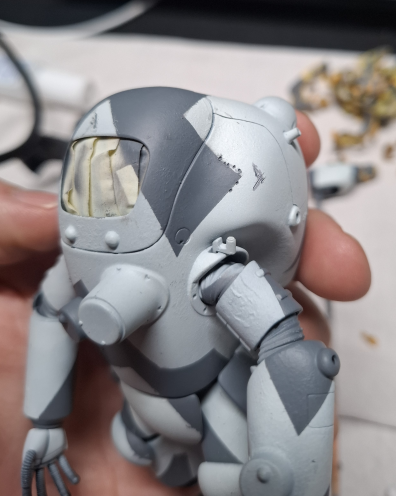
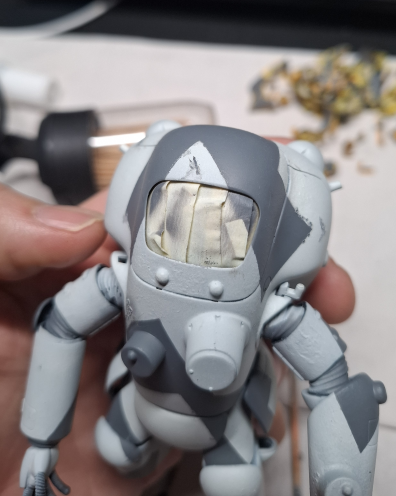
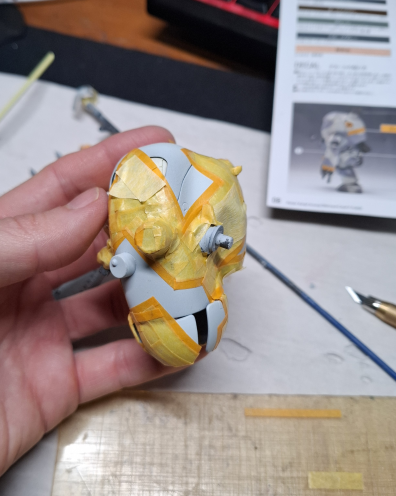
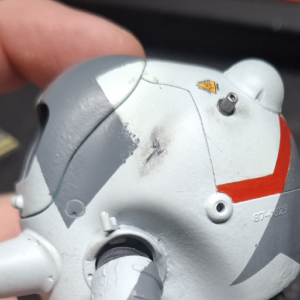
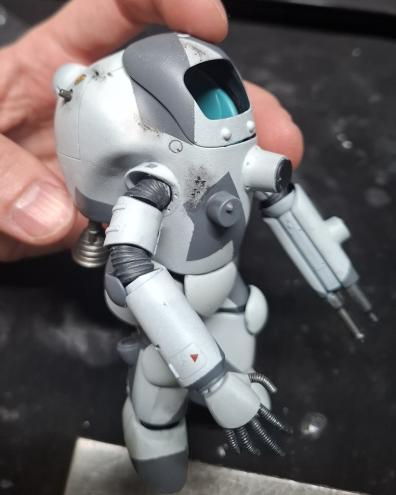
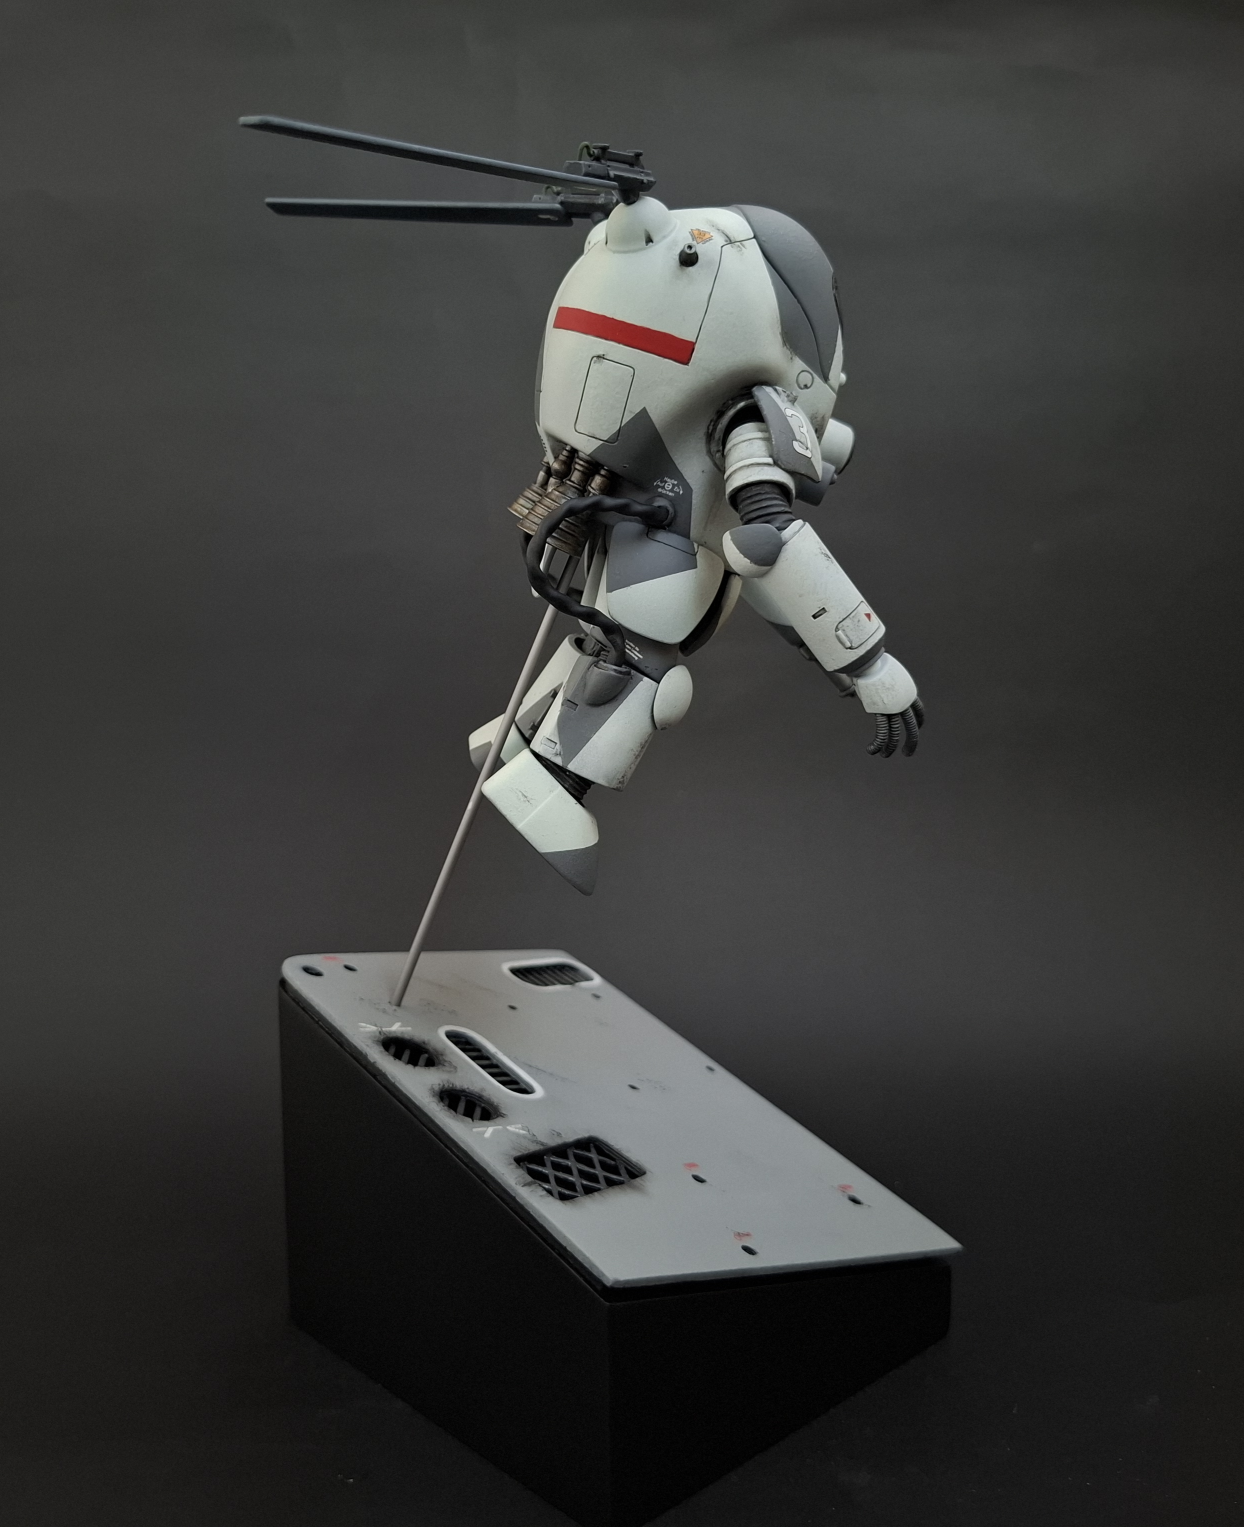
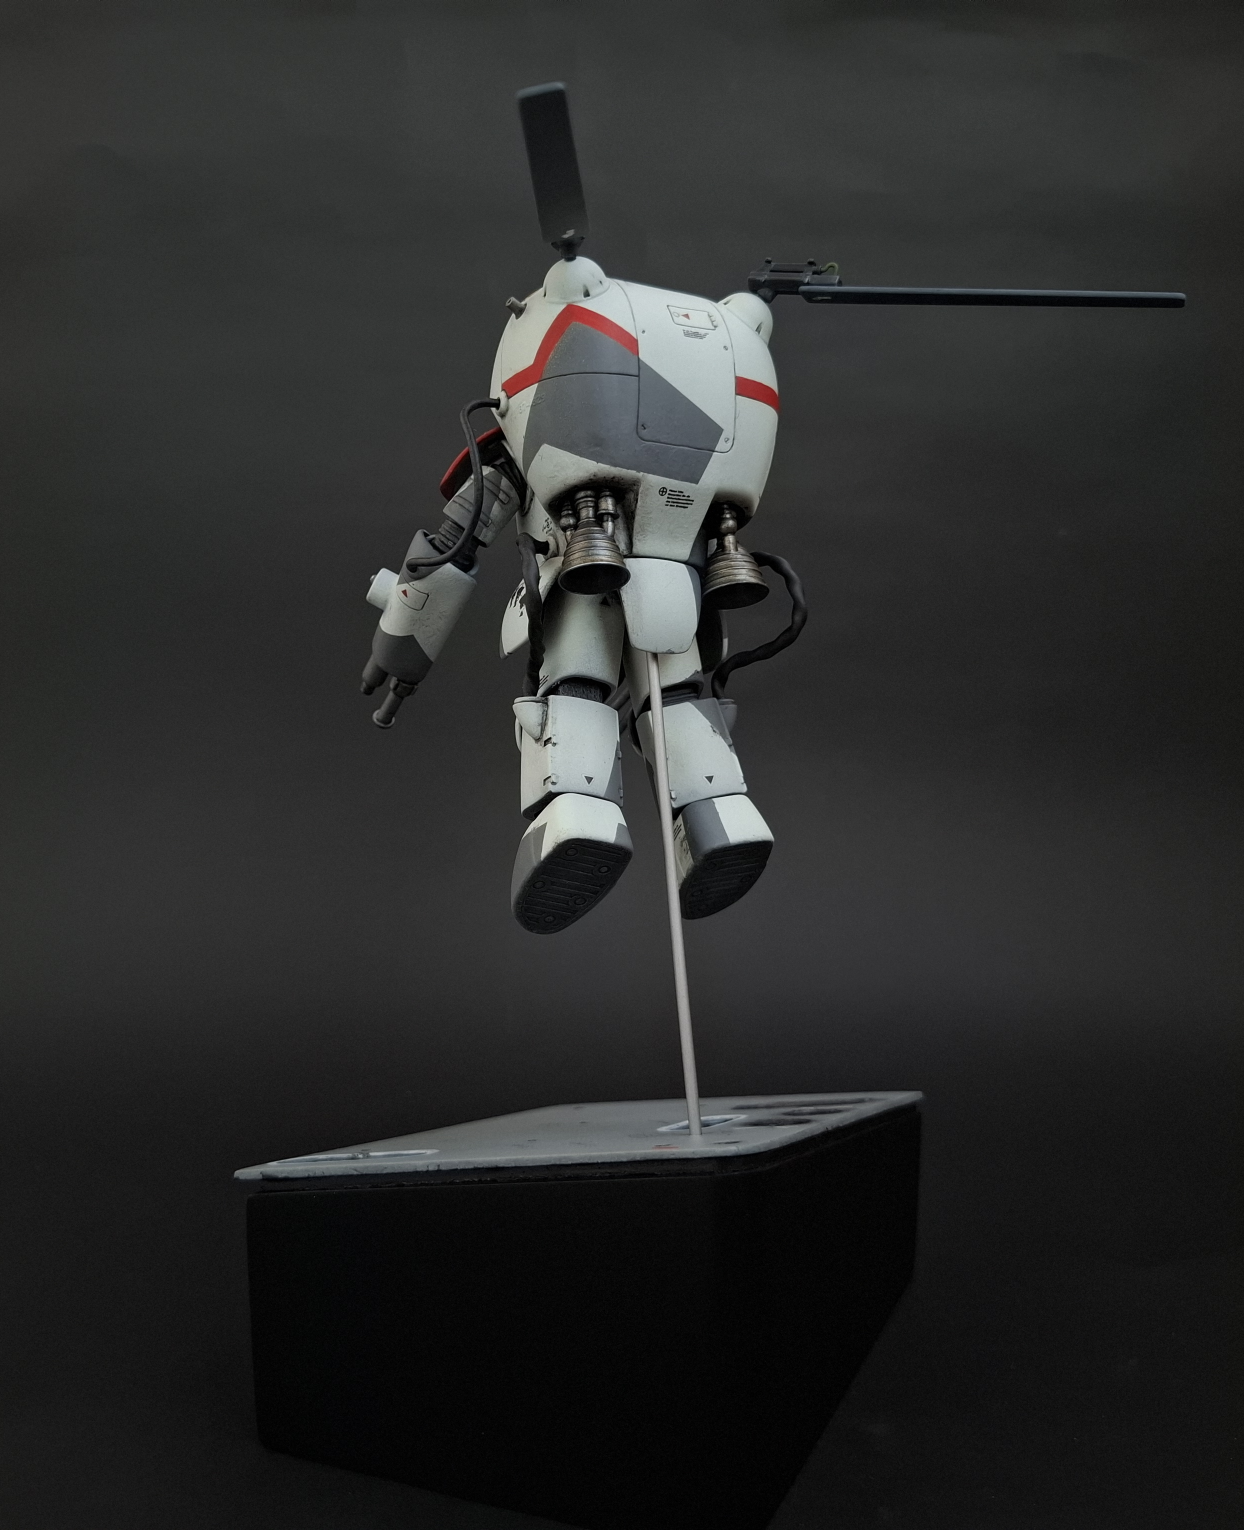
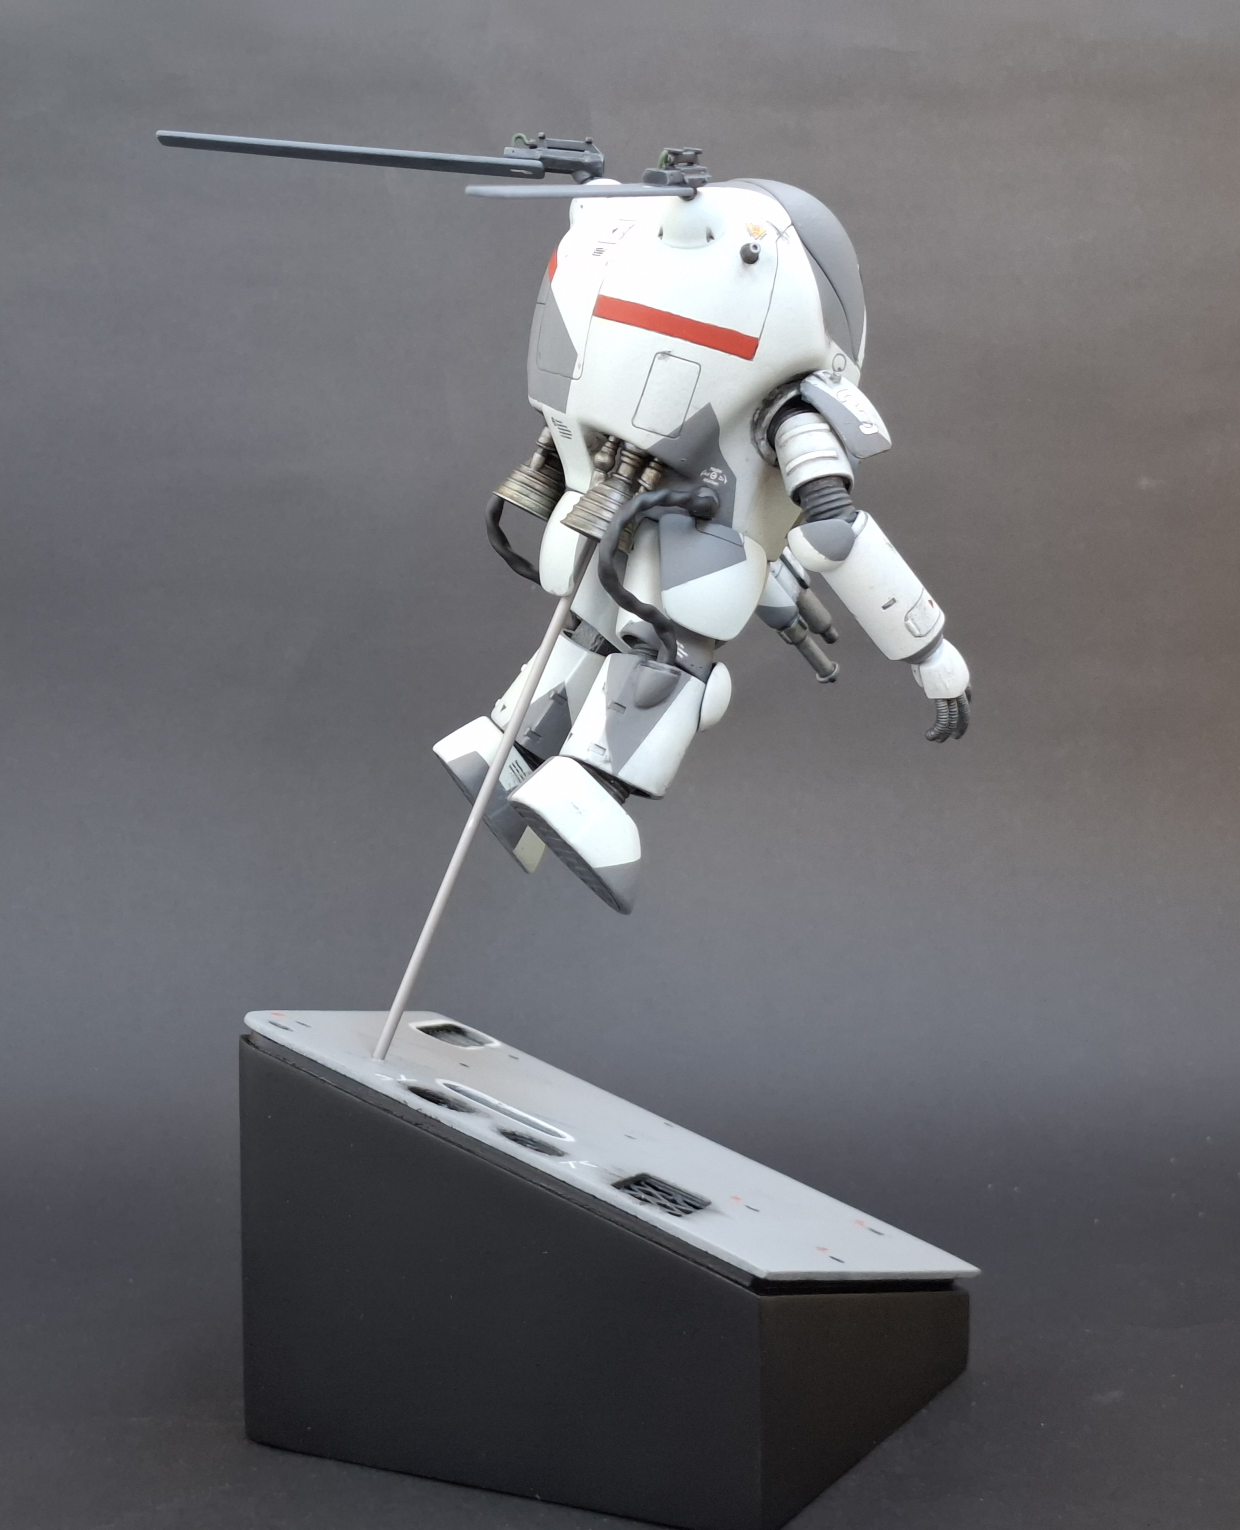
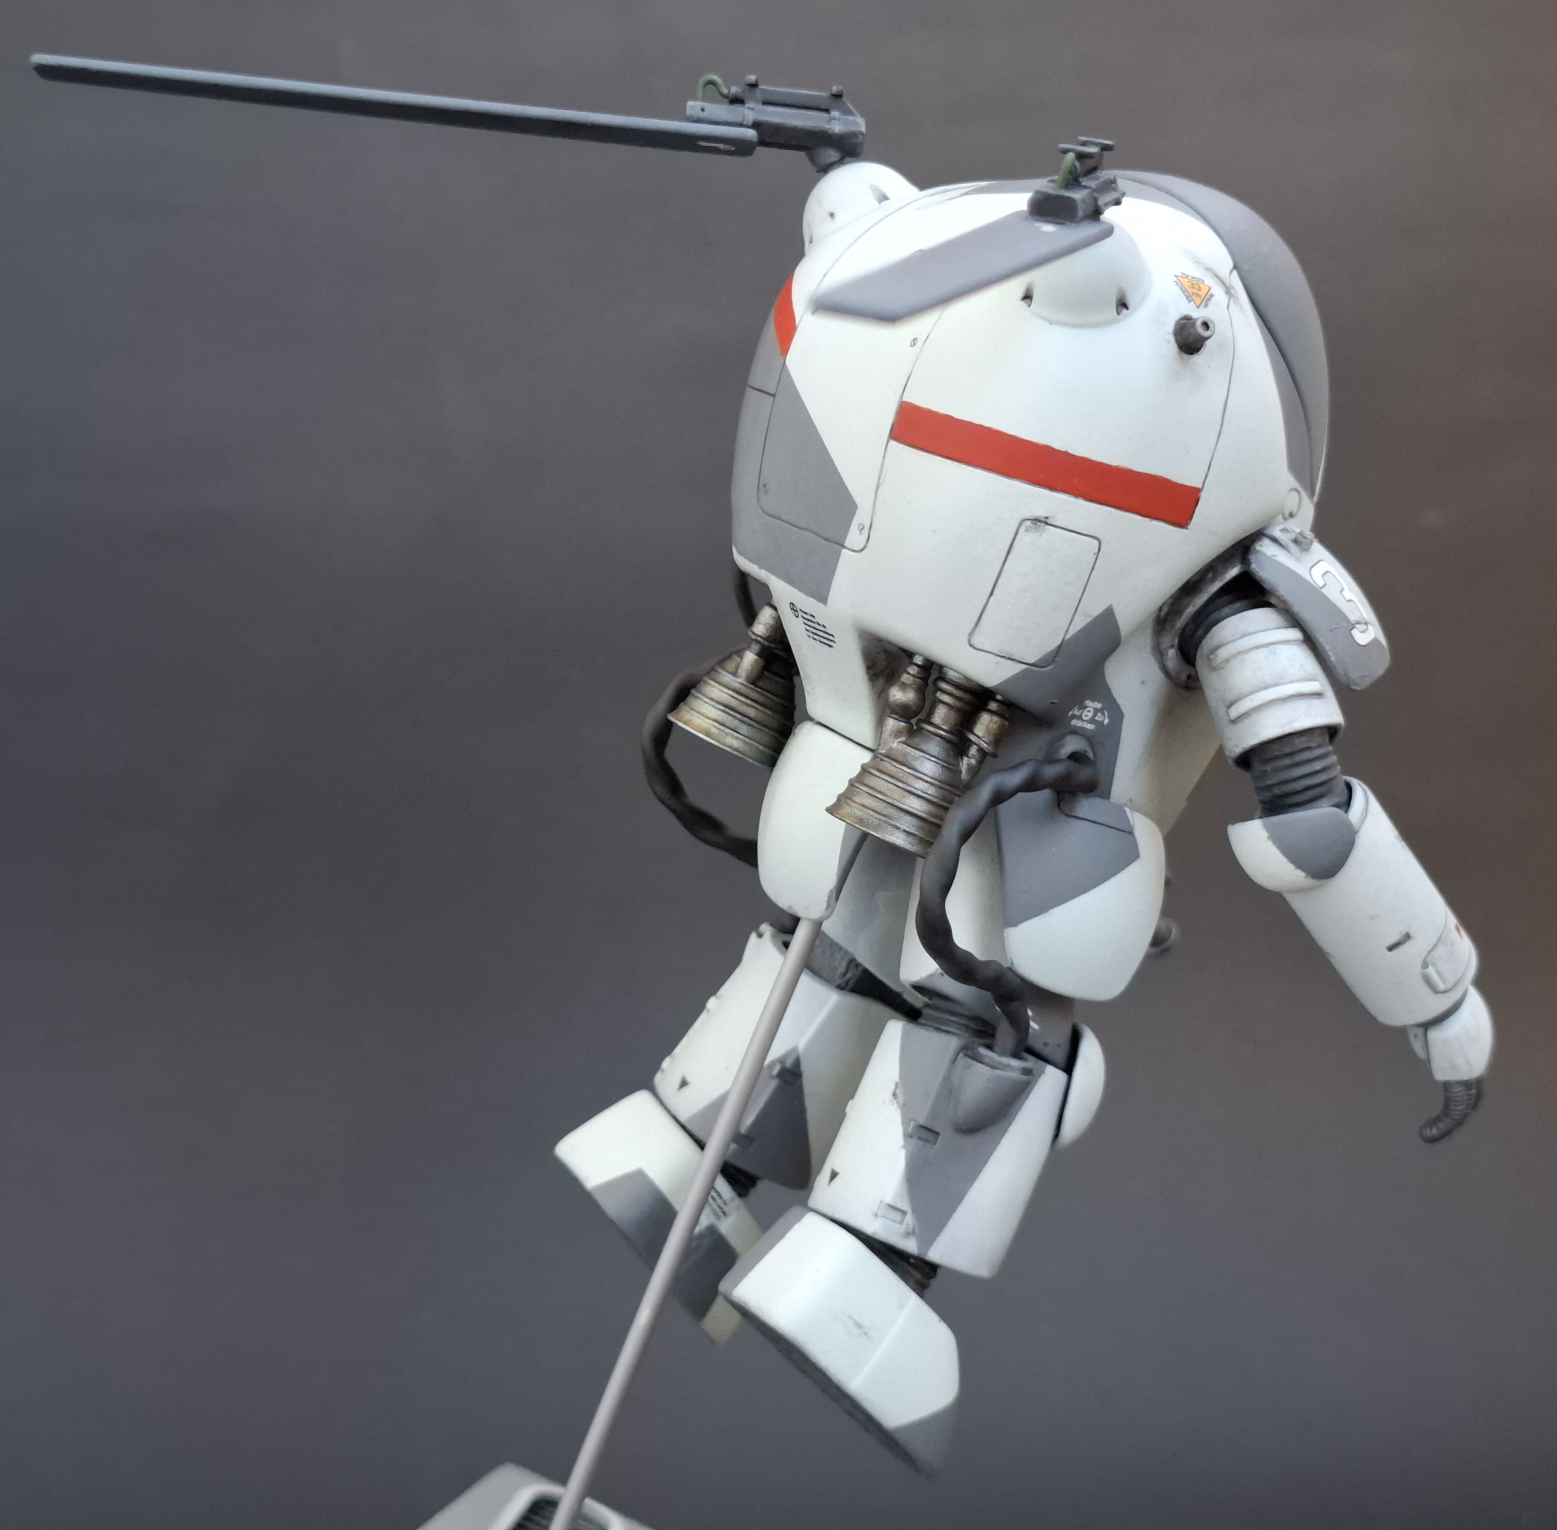
Suit
To focus on execution, I choose to aim for the box art camo. My main colour came out more blue-grey, but with this coat down it was to mask up. For the suit I cracked open my “fancy” hobby grade masking tape.

While looking for cockpit colours to contrast the pilot I was inspired by haf_gunpla‘s Fliege build. This turquoise colour also contrasted the main camo colours well.
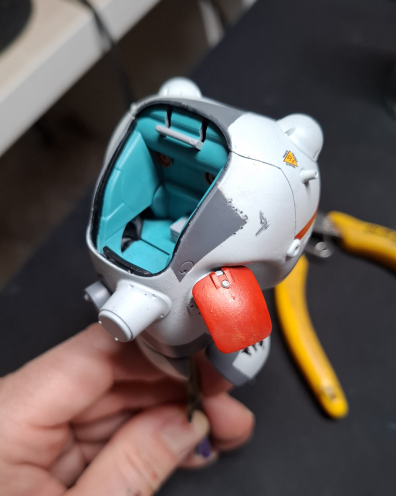

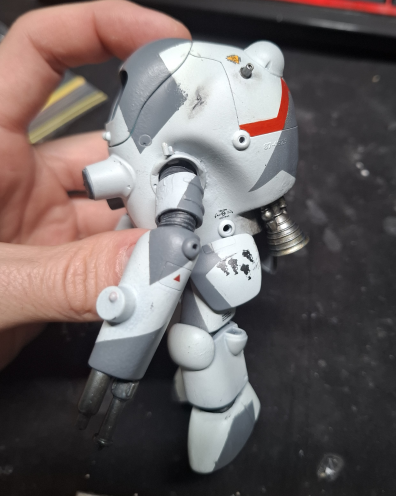
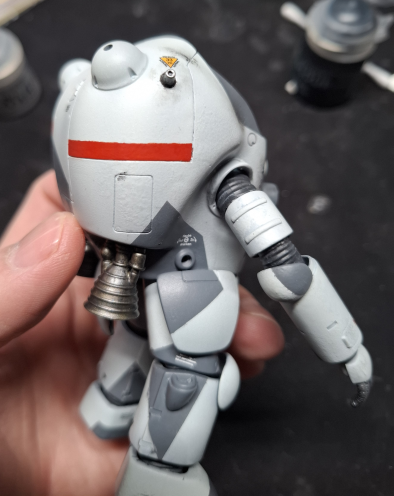
I didn’t follow the box art for the ID band colours because I have a bottle of Vallejo Game Colour Scarlet Blood which I fancy. Masking tape and the camo pattern were my guides to for adding the ID bands on the rear of the suit.

For the physical damage I used black, dark grey and small amounts of gunmetal. Black went into the deepest parts of the damage, then the raised parts got dark grey. Gunmetal was then used to lightly “highlight” the dark grey areas on the larger damaged areas.
Nicks and scratches were applied with a tooth pick, again using black then dark grey to give the impression of depth. To blend in the weathering I lightly sponged the dark grey around the weathered areas, along with some pigments.

Pigments were used again to create soot from the thrusters. I used the darker colours from Tamiya Weathering Master sets A & B. I attempted to create a burnished effect with the metallics from set D, but I found them hard to work with.
Below is the gallery for painting and weathering the suit with some ALMOST final images!
Suit Painting and Weathering

Conclusions
We did it. We achieved eternal glory by placing second!

Eternal glory aside, there were some objectives I didn’t achieve. I bailed out on adding floating debris to the vignette as the deadline was approaching. As for the overall wash, I completely chickened out. I was happy with how the physical damage turned, but I had to add way more than I wanted too because my masking was not tidy enough. This added a few nails to the overall wash coffin.
Overall I gave myself the scores below for each objective.
- Display the kit in a vignette set in space with floating debris. – 50%
- Mask and airbrush a camo pattern. – 100%
- Create soot around the nozzles using Tamiya Weather Master. – 100%
- Create small physical damage. – 75%
- Use an all over wash on the kit. – 0%
There’s definately room for me to improve my masking for air brushing, and this build is now my data point for the time required to created vignettes and dioramas.
Enjoy the Finished Photos below!
Finished Photos


Check out some more builds!