3D printing has decentralized the manufacturing of plastic parts, and its advantages have definately found their place in plastic modelling. Whether you own a printer or not, here is how it can boost your current and future kitbash projects.
Contents
Third party parts
3D printing has planted, fertilized and sprouted a botanical garden of vendors offering printed parts and files. To help see the forrest from the trees, lets start with some advantages of using third party parts.
Key advantages I assess are the design of the parts, and time saved. So I ask myself, are the parts unique? And will using these parts save time by moving the project forward?
Therefore, the “perfect” third party part would be one thats too complex to scratch build and completes a portion of the kitbash.
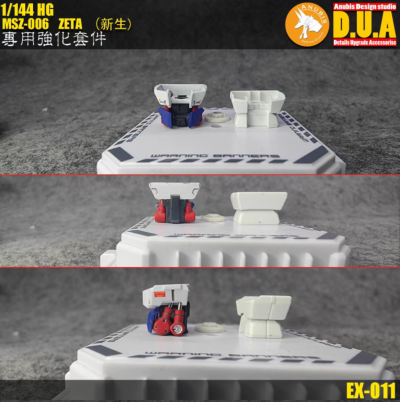
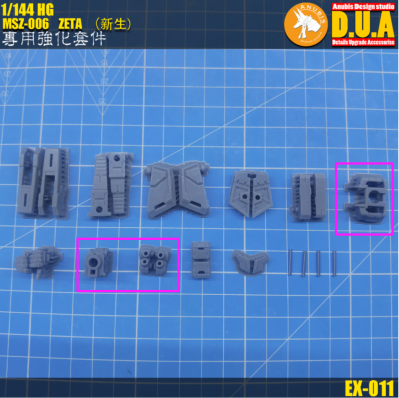
A good example of such a part is the torso assembly included in the HGUC Zeta Armor Detail Pack, pictured above. Torso sections can be a tricky part to kitbash because the connection points vary between Gunpla series, so heavy modification is usually required.
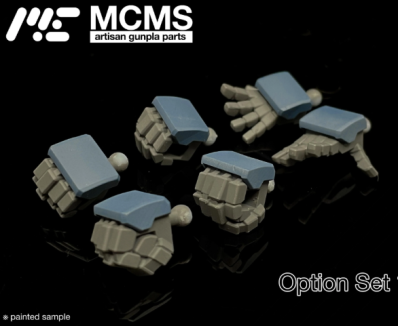
Hands are another example of parts that are difficult to scratch build. And the annoying reality is that hand options are not always provided in kits. Luckily, there are third party sets available from vendors such as NewType, who have a large suite of third party options.
While these examples have been physical printed parts, you can similarly assess printable files from sites like Thingiverse and Cults3d. These repositories are not plastic model vendors and host files from various sources, so it pays to be more diligent when selecting files.
Pre-Buy/Printing Checklist
Now that we’ve found the “perfect” third party part what are the next steps before buying or printing?
Much like trees, all vendors are not born equal, and dodgy 3D prints or files can really sap a project’s momentum. To keep this momentum up, verifying a vendor’s/source’s reputation can go a long way. All 3D printed parts will require prep work, and confirming the vendor’s/source’s reputation can help us know ahead of time how much prep will be needed.
Confirming the compatibility of the parts is next on the list and needs to be treated in two parts. Fitment is the first part, because if we’re wanting to save time while adding details to our kitbash, the parts need to fit. While parts modification is at the core of kitbashing, we’re not getting closer to finishing the project if the parts require a heap of modifications.
The next part is painting, and is especially important when buying printed parts. There is a huge range of 3D printing materials available, and checking that the material is compatible with our painting and modelling materials is key. Great kitbashes blend all the additions seamlessly, and a good third party part should facilitate this.
Lastly, we need to confirm if using third party parts is legal. This is applicable for competition entries because its not uncommon for these parts to be ruled out.
For example, GUNPLA BUILDERS WORLD CUP (GBWC) regulations state that entries shall only include models created using offical gunpla parts. However, other materials can be used if their original form is unrecognizable through modification. This definately cancels out any time gained from using third party parts.
Local or online comps are more open to third party parts, usually only ruling out parts from bootlegs/unlicensed copies. I completed a Sinanju kitbash using 3D printed parts for the UC verse AU contest hosted by ZakuAurelius (YouTube, Store, Blog) & USA Gundam Store.
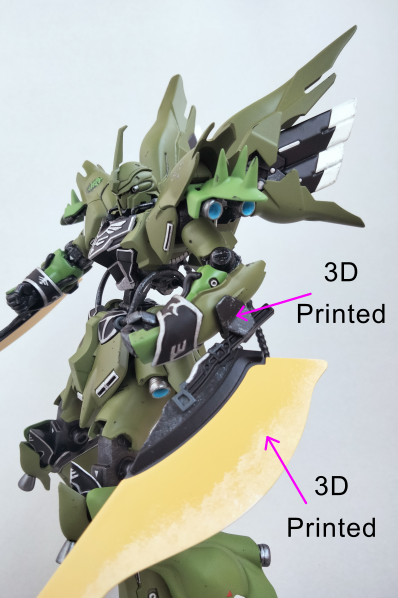
– Weapon holder and blades
– Heel details
Designing and printing the weapon holders and blades was faster than scratch building. Machines are also much more efficient at repeating tasks, such as making four copies of the heel details. (More images of my Sinanju kitbash can be found here.)
Repeatability
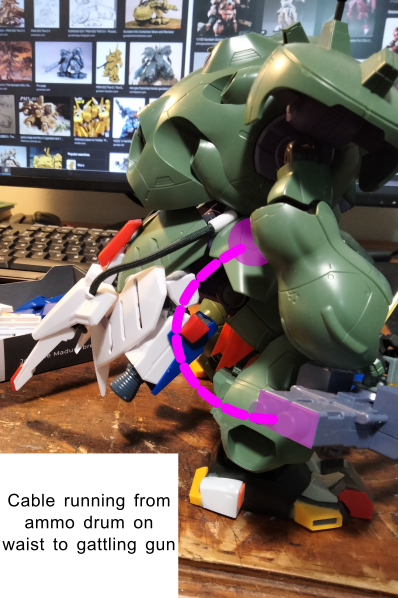
As foreshadowed, 3D printing can help kitbashing is with its repeatability. For my Gusion project, I wanted an ammo chain looking cable running to the gattling gun, but I didn’t have any suitable spare parts. Scratching building the multiple parts would require me to dedicating a large amount of time on this single feature, and that is a clear way to burnout on a large project.
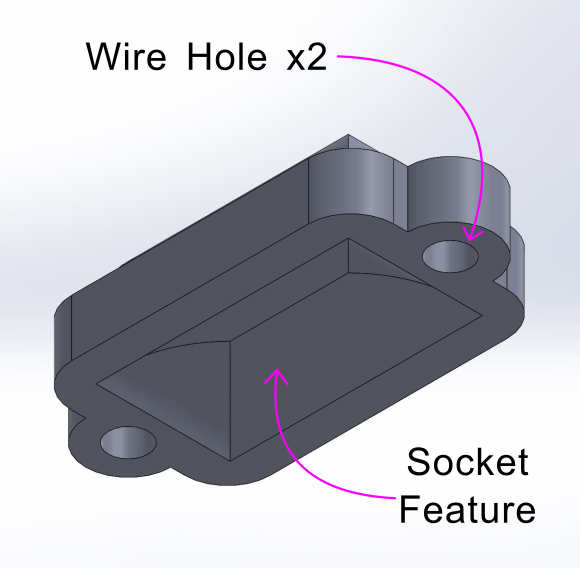
I had a rough idea of the final pose for the kit which needed the chain to curve into position. This meant each chain link needed a rounded ball and socket feature.
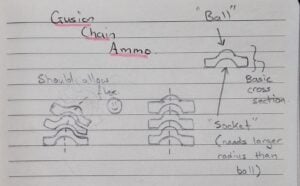
With the shape of the mating parts being rectangular, giving the links a similar shape would create an easier transition.
First point chain connects
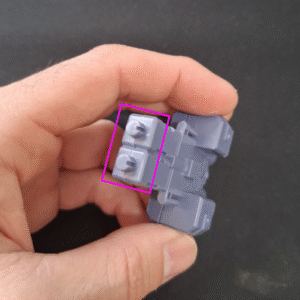
Second point chain connects
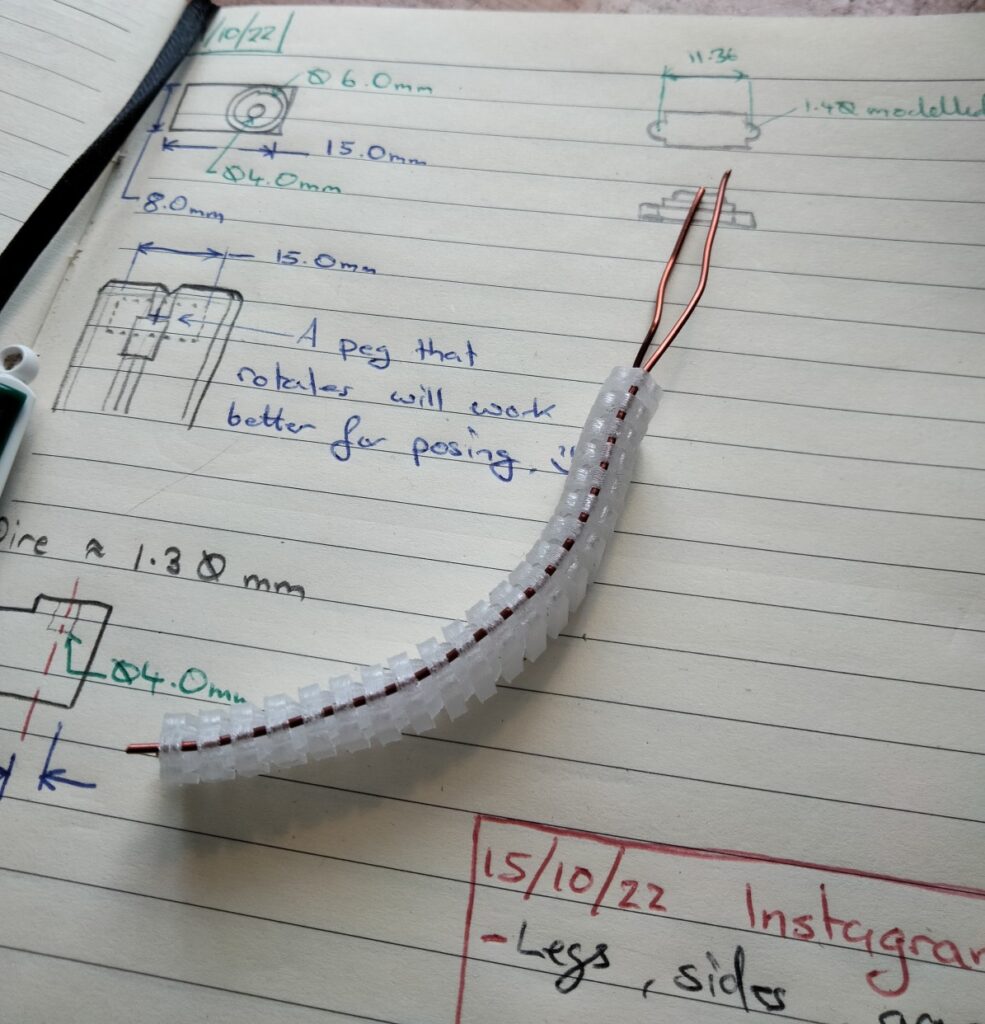
Springs and wire are common solutions for creating flexible cables and I used them previously on my Sinanju build. I wasn’t making a round cable this time, so I choose to add the wires to the short sides of the cable sections. Adding them here would further help the transition to the mating parts.

With the model complete it was time to slice and 3D print. I printed the parts in batches so I could work on other parts of the project while the machine ran.

And here are the results!

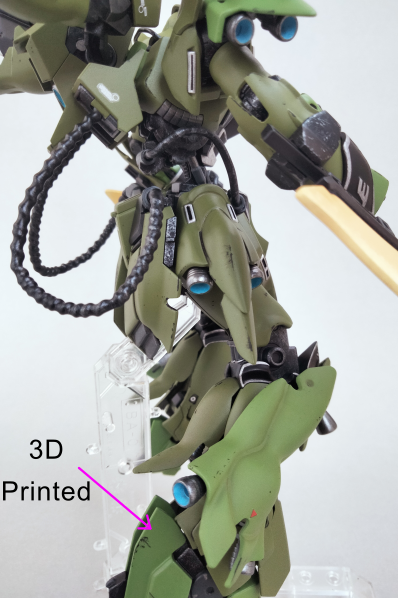
A tonne of 3d printed parts went into this Gusion project and some are not even visible from the outside. The noticable 3D printed parts include the shoulder details and large spikes, the display stand, and the recycled raft sections.


More Parts, More Kitbash
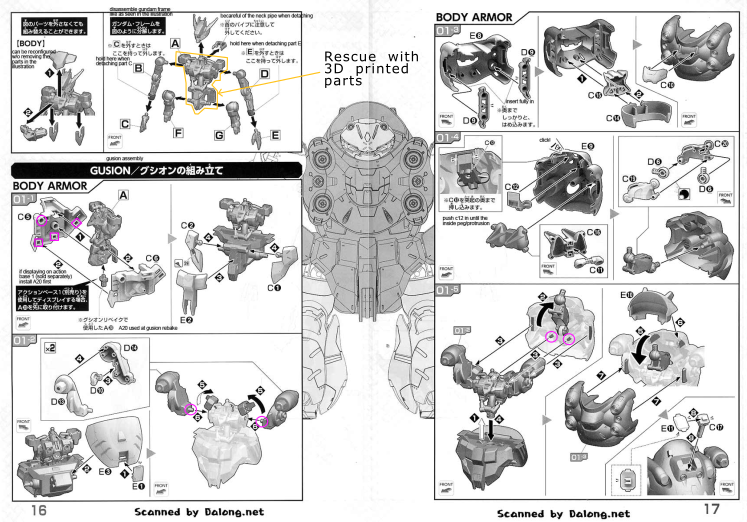
There is no kitbashing without parts to kitbash with and 3D printing is here to help. To partforms the Gusion Rebake back into the Gusion the torso and waist are completely covered in armor. This is such a waste of the nicely detailed inner frame which is begging to be shown off!
The first step in rescuing the inner frame is to identify all the connection points. From Step 01-1 we can see that parts C5 & 6 have four points between them. These points are sufficient to keep parts C5 & 6 rigidly connected with the waist frame removed. The torso frame has five connections points. Two are for the arms shown in Step 01-2. While Step 01-5 showns the remaining three, two for the rear armor part E9, and the last for the waist seciton.
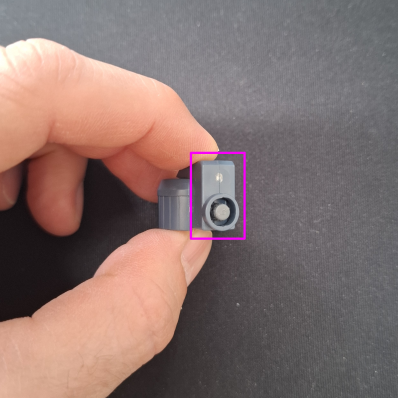
I started with replacing the waist frame and found a ball socket that fit in the space available. Next I measured up the ball socket and space available.
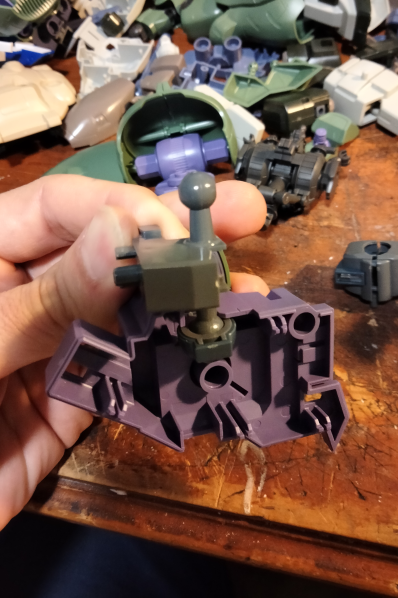
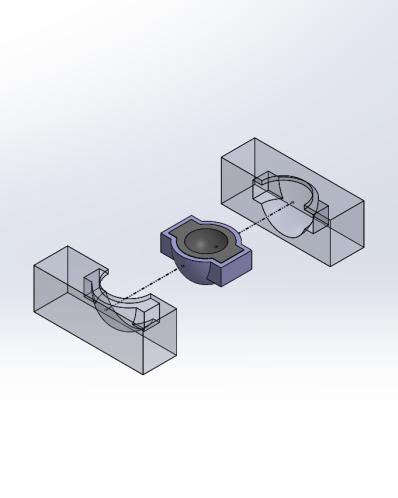
There was a descent sized rectangular space that enveloped the ball socket. So the 3D modelling began with this rectangle, before modelling the ball socket. Next the ball socket was subtracted from the rectangle. Finally the part was split in half to allow the 3D printed waist to be assembled by sandwiching the ball socket.
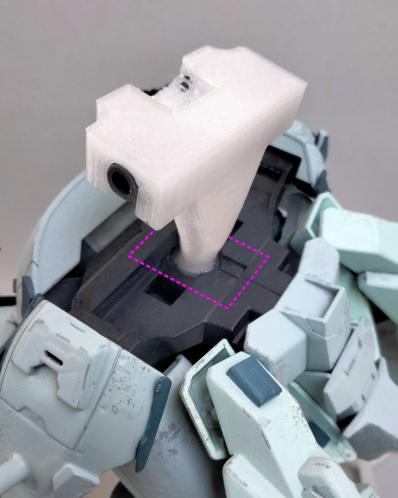
Modelling the torso replacement began with sketching and measuring the positions of the connection points. I choose to include polycaps in the design of the torso to assist with alignment.


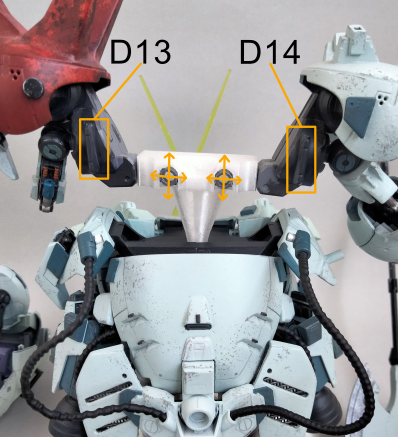
My concerns for alignment stemmed from the tabs on the Gusion shoulder parts D13 & 14. These will have to align with the armor parts E8 & 9 when connected to the replacement torso. Therefore by inserting a compliant part like a polycap I can give the replacement torso abit of flexibility to help with alignment.
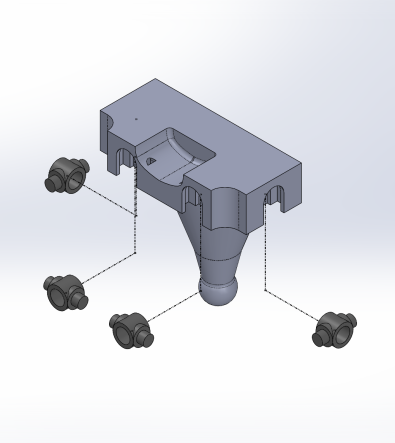
with polycaps
And here are the results, more parts for kit bashing!
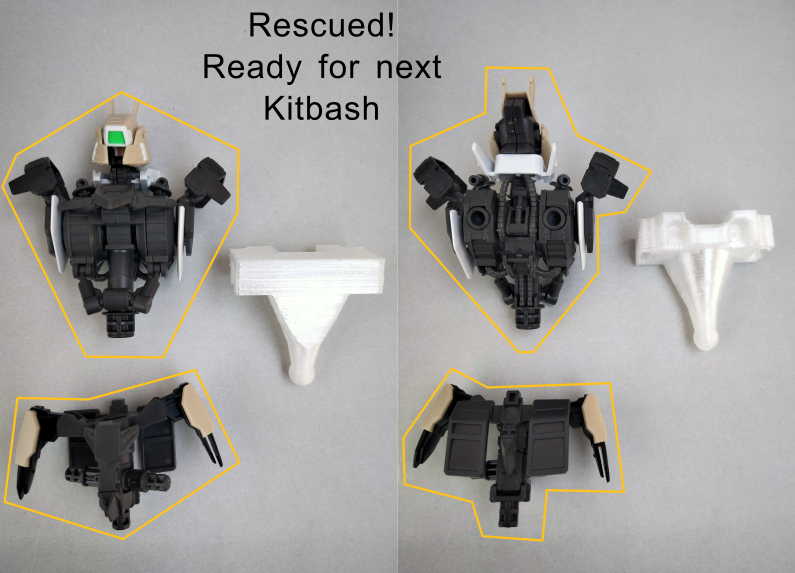
Keep reading or checking out the more images of the Gusion Kitbash.
Cheers!