The power and convenience of 3D Printing was harnessed again to buff my Warhammer 40k Necron army. This time with another unit of Skorpekh Destroyers.
Contents
Objectives for this side quest from Gunpla were, to setup Orca Slicer for my Creality printers, emulate a paint scheme, try DIY texture paint, and complete the models in a week.
Orca Slicer is an advanced 3D printing slicer designed for FDM and resin printers. It is a fork of Bambu Studio, which itself is based on PrusaSlicer, offering a user-friendly interface with powerful features.
Midwinter Minis‘ Makhiban Dynasty Necrons paint scheme was prefect for this project. Recreating it would be an exciting challenge, while the use of putty with a worn and weathered finish would hide print imperfections.
Lettuce begin!
3D Printing
Setting up Orca Slicer
Before we can get any proxies 3D Printed we need to setup Orca Slicer for our printer. A robust primer and starter guide for Orca Slicer can be found on YouTube by Teaching Tech.
Here I will focus on configuring for my fifth Creality Printer Marvin 5.
The first step is printer selection and we want a Generic Marlin Printer as this is the firmware running on Marvin 5.

Next is to edit the printer settings to match the size and capabilities of Marvin 5. Working left to right through the tabs we’ll enter the size of the printer under Basic Information.

The next tab is Machine G-code. This is where we’ll edit the start and end G-code.
For the start G-code we’ll want to include codes to run bed levelling and store the results. I have also included M104 and M0 codes to begin heating up the extruder and pause the machine so we can apply glue to the bed.

The end G-code is then edited to match the default code in Cura.

We’ll leave the Multimaterial default because its not applicable to our printer, and then update Extruder tab with the values determined through tuning in Cura.

The final tab to update is the Motion ability and this an important one as limits the machines accelerations. These values should consider any modifications that have altered the mass of moving parts and/pr the rigidity of the printer.
Since I have upgraded the extruder to the Micro Swiss NG I have changed the mass of the x carriage. V-Rollers are also less rigid than linear rails and bearings so I have set my limits equal to or less than the original values from Creality.

Slicing the Model
With the advanced features within Orca Slicer there were minimal changes made to the default 0.12mm Fine profile. The material I used was black PLA+ from Dremc, which I used to tune the extruder settings in Cura Slicer.

Again, considering the modifications to the printer and its rigidity I dropped the printing speeds from the default values.

By default the profile does not include supports so I turned them on and selected the organic tree supports. These supports are excellent as they have a smaller contact surface with the model, making them ideal for the spindly details on the models.

Given the number of supports required, I printed one model first and removed its supports to investigate if the support settings needed adjusting. It would be a sub-optimal adventure to print all three at once AND then find out the supports are unremovable.

After printing the first model to test support removal, I changed the seam setting to use a Scarf Joint and printed the remaining models and their bases.

Preparation
This step begins with removing the 3D printed supports. These models are very detailed and spindly so I would recommend printing some spares if its your first time.
Managing expectations is also key during this step as FDM printing will not resolve all of the details and some of small ones are not going to survive.

Personal Protective Equipment (PPE) is essential during this step as the tools used can create plastic projectiles hell-bent on deleting your ocular functions.

Once we’ve donned our PPE we can use snips to begin removing supports around the legs. Start with the thin parts contacting the model until the tree of support breaks free.

Take care that the snips are not applying to much force to the model and note support trees can be interconnected. Identifying and separating interconnected support trees can avoid applying too much force.
There are small support branches that will need to removed with the Dremel and a small burr tool. A small drill and pin vice is also helpful here.
With the tree and branches removed smaller imperfections can be removed with a hobby knife and sand paper.

The remaining super obvious layers lines can then be sanded away. I did not go crazy removing layer lines as did for my Scarabs. Instead, I choose these imperfections as targets for the upcoming Modelling steps.
Modelling
I followed the Midwinter Minis video closely for this part but substituted out the milliput for Sikaseal Acrylic 100 Gap Fill.
It was hard getting thin sheets with the Sikaseal even when using a wet plastic bag. I think this was because the outer surfaces of the Sikaseal dried alot faster.
I managed to slavage some fleshy looking pieces and applied them to the models, while the useful leftovers went onto the bases.


I had more success with the PVA and CA glue gore than with the Sikaseal. That step was very time dependant w.r.t how long the PVA was left to dry. It did add some finer details to the Sikaseal flesh, so i’ll definately be experimenting with PVA and CA glue in the future.
Painting
DIY Texture Paint
I have wanted to try out cheap heavier body acrylics since watching Midwinter Minis’ video on 30 FREE wargame basing materials. The final inspiration came from Bunnings having them on sale for just 2 dollaridoos.
Once I found a suitable jar, it was off into the neglected garden bed to find some dirt. I grabbed a handful of the slightly more rocky dirt, and added some more (larger) rocks for variety.

I started with a ratio of 1:1 (dirt vs. paint) and added water to get a consistency of strawberry jam that has been left on the counter for about 15 minutes. Basically spreadable with less effort than vegemite.

The paint was applied to the bases quiet hap-hazardly with the same large brush that did the mixing. It went on very wet and shiney, but dried extremely matte. Not bad for 2 dollaridoos!

The Models
The models began with a stippled on coat of brown all over. (Vallejo Heavy Sienna)


Next, they were given a coat of brass (Citadel Skull Crusher Brass) with a similar stippling action, avoiding the fleshy parts.


The was followed by a gunmetal (Vallejo Gunmetal) over brush on the brass aiming for a worn metal finish. Its ok if this step looks a little bright, because the next step is a sepia wash that will back down the brightness.


Now we’re on to the fleshy parts. I made custom mix from Moot Green, Black, White, and Brown that I would describe as a “grey green”. I applied this in multiple coats ensuring I covered all the modelled flesh and gore.

For the en-bloodening Vallejo Scarlet Blood was used. This was painted on the edges of the modelled flesh and all over the gore. Surrounding areas I felt would help sell the effect of bloody flesh also got some Scarlet Blood.
To finish the bloody flesh it was also given a sepia wash.
The final step was going back over with gunmetal to highlight and bring out details on the weapons.


Conclusions
If you were picking up that this was alot of work to complete in a week, you’re correct!
I did spent more than 38 hours getting these models completed, and I’m surpised by how short the list of lessons learnt is.
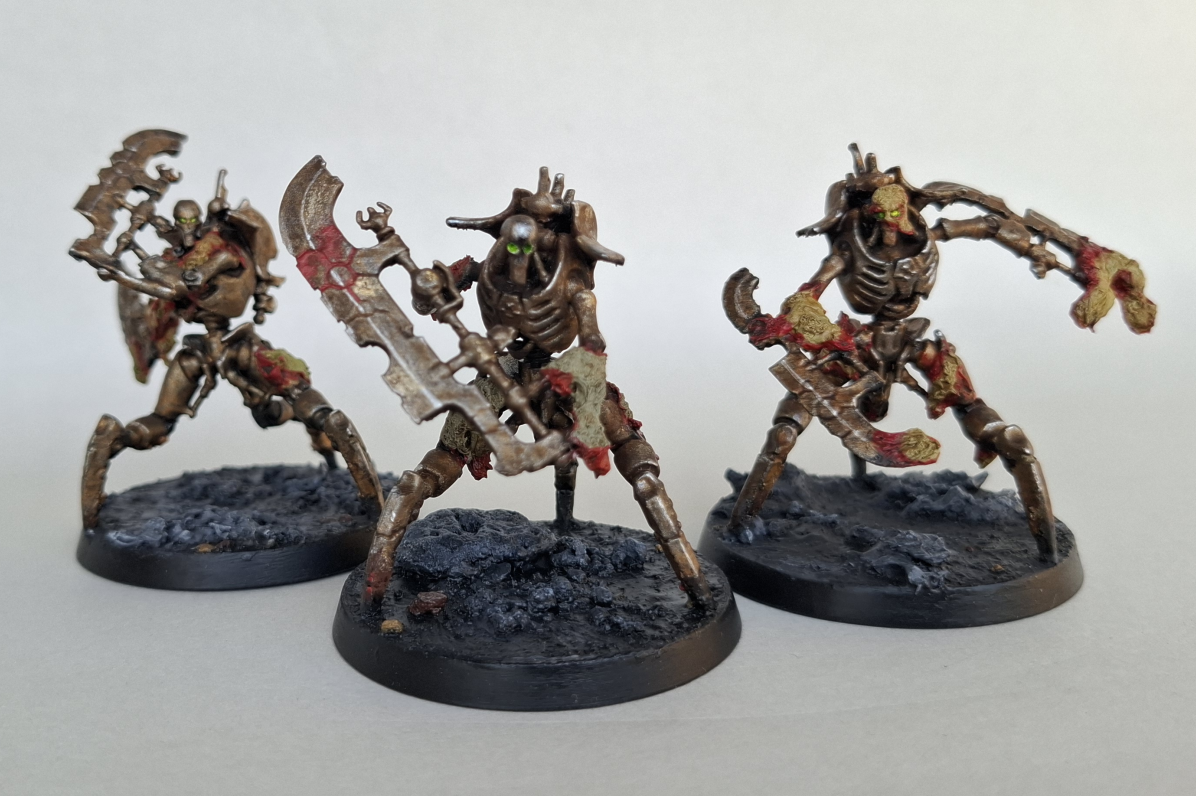
The first take away I noted while painting the second model as I failed to match the flesh colour I mixed for the first model (shown centre below). So next time I’ll be writting down my paint mixes as I go.
I also didn’t do the best job at emulating the paint scheme as I skipped the hightlight of the flesh parts and didn’t give the bloody parts a glossy finish. This one I’ll chalk up to going over time, and a finished model is better than an perfect model!
Check out more finished and work in progress photos in the gallery below.